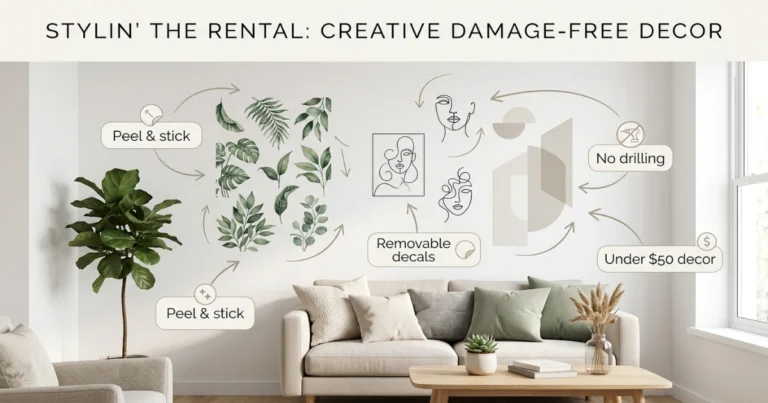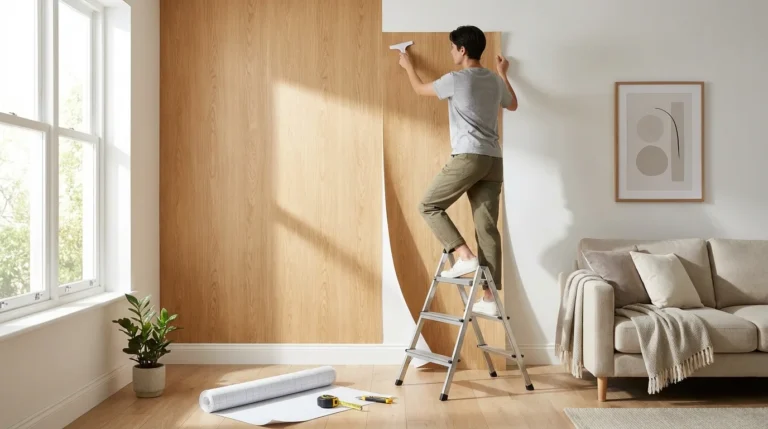
Peel and stick wall decorations are renter-friendly, removable wall solutions that instantly refresh a space without paint, tools, or permanent changes. Available as decals, panels, faux brick, and peel-and-stick wallpaper, they offer a stylish, low-commitment way to personalize your home.
These adhesive wall decor options work especially well in rentals, kids’ rooms, and home offices. Designed to stick securely to smooth walls and remove cleanly, they’re more affordable and far easier to install than traditional wallpaper.
Below, you’ll find a breakdown of the most popular types, must-have features, and smart buying tips to help you choose the best peel and stick wall decor for your space.If you’re new to renter-safe upgrades, start with our full guide to peel and stick decor for a room-by-room breakdown of what works best and what to avoid.
Key Takeaways
- Peel and stick wall decorations are a quick, non-permanent way to transform any room, from kids’ rooms covered in character decals to chic spaces adorned with abstract or quote decals. They bring color, personality, and thematic styling without repainting or drilling in walls.
- They’re affordable compared to other options such as paint, traditional wallpaper, or actual tile, especially when you use sticktiles backsplashes and sample decal sets. They’re easy to update a space, often without a big time or money commitment.
- Easy, no-muss installation and removal make peel and stick décor perfect for renters, student dorms, and first-timers. With minimal surface preparation and easy installation, anyone can achieve professional results and swap designs as style evolves.
- Peel and Stick deco works best on clean, smooth, dry surfaces such as painted gypsum, glass, metal, and tile. Textured walls and damp or dusty surfaces will reduce adhesion and durability. By checking any environmental factors such as humidity or sunlight, we help ensure great long-lasting results.
- Innovative decal applications on furniture, appliances, doors, and more take them beyond the traditional world of wall décor. Combine modular murals, tile panels, and smaller stickers for truly custom layouts, seasonal displays, and pop-up art installations.
- Selecting non-toxic, low-VOC, and eco-friendly options promotes healthier indoor air and reduces environmental impact, while quality components enhance longevity in high-traffic spaces such as kitchens and playrooms. Reading through product information, safety standards, and care details assists in pairing the perfect peel and stick solution to every project.
The Transformative Power of Peel and Stick Wall Decorations
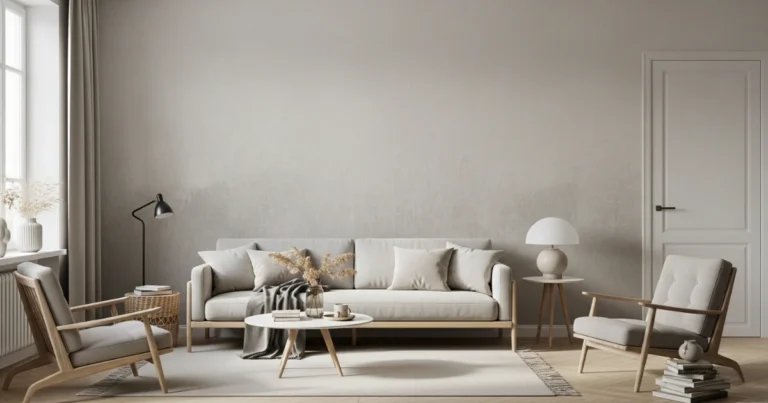
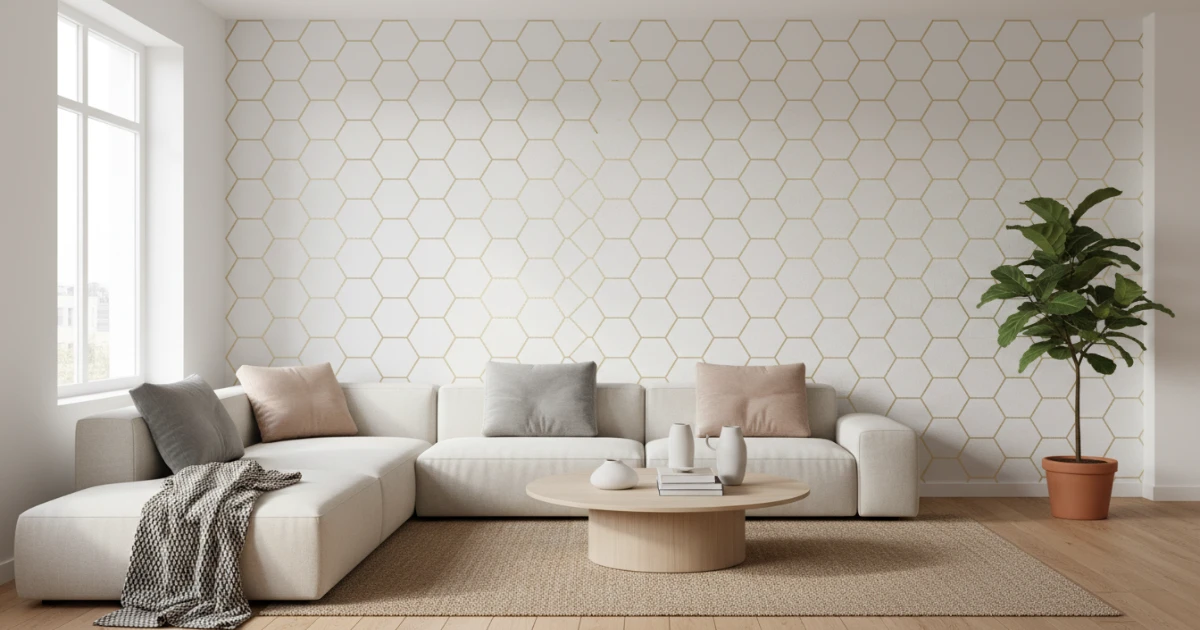
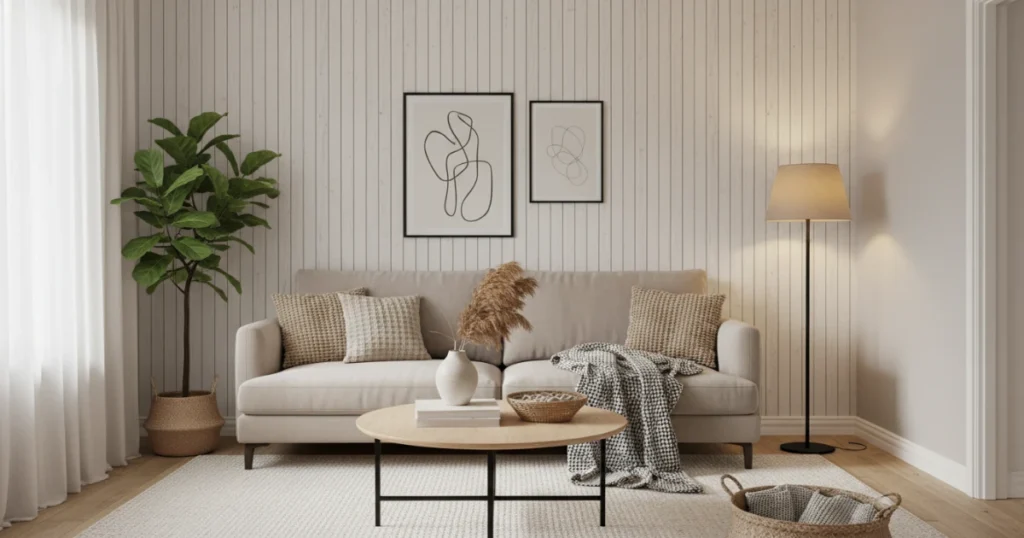
Peel & stick wall decals will transform the feel and look of a room without any of the hassle. Modular mural peel panels and wall art kits can cover a blank wall in minutes, injecting a space with an immediate theme, color story, or mood. A no-frills study nook will take on new depth with a city skyline mural peel, while an underwhelming hallway becomes a mini art gallery with framed-style stick wall decal sets.
1. Affordability
Stick wall decals and removable wallpapers provide a less expensive route than paint, framed art, or complete wall paneling. A roll of peel and stick wallpaper or a wall art kit can be a fraction of the cost of a full paint job, eliminating the need for primer, paint brushes, or labor costs. This translates to a complete room refresh coming in under a reasonable budget, especially when using modular mural peel options.
In kitchens and bathrooms, stick wall decal sets and peel and stick backsplash panels can effectively replace real tile. Instead of paying for ceramic tile, grout, and a tiler, users can cut and position the panels on a bare wall in just a few hours, enjoying vibrant color and dynamic designs.
2. Simplicity
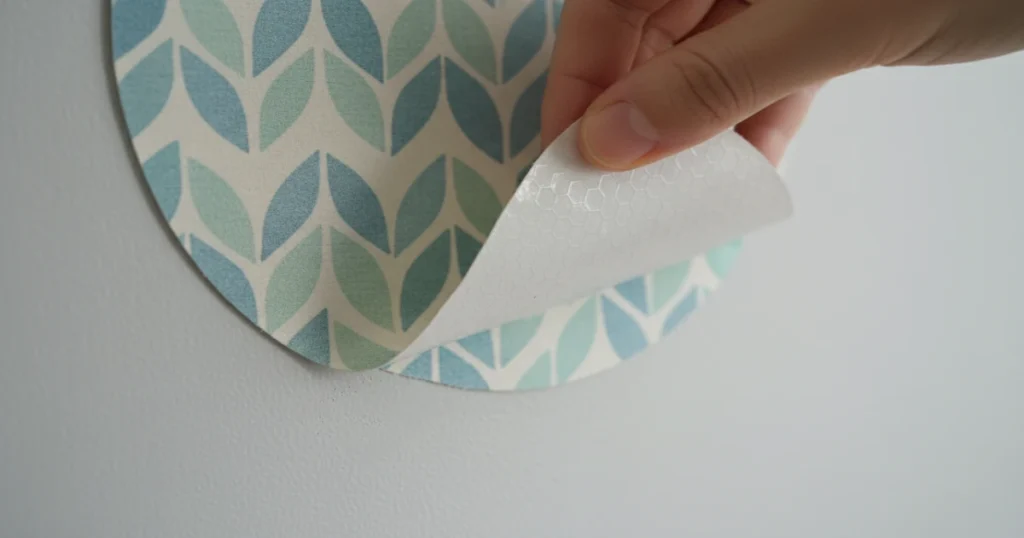
Peel and stick wall decorations require no nails, glue or special equipment, which reduces installation time and mess. Stick wall tiles, décor stickers and stick rolled backsplash have a backing sheet. Users clean the wall, peel the liner, then smooth it down by hand or using a small plastic card.For full prep, measuring tips, and removal best practices, follow our removable wallpaper guide before installing large panels or full accent walls.
Even novices and renters can achieve a clean, almost professional finish by adhering to straightforward step-by-step instructions included with most products. A basic reference table helps:
| Step | Action |
|---|---|
| 1 | Clean wall: smooth, dry, dust-free |
| 2 | Mark layout with light pencil lines |
| 3 | Peel backing from top edge only |
| 4 | Stick slowly, smooth out air from center |
| 5 | Trim edges with a sharp craft knife |
3. Versatility
Peel and stick designs work on many surfaces: painted gypsum, smooth plaster, sealed wood, glass, and some metals. They last longer, usually up to three years, on clean, dry, non-textured walls, as that provides a strong adhesive seal and reduces bubbling and premature peeling.
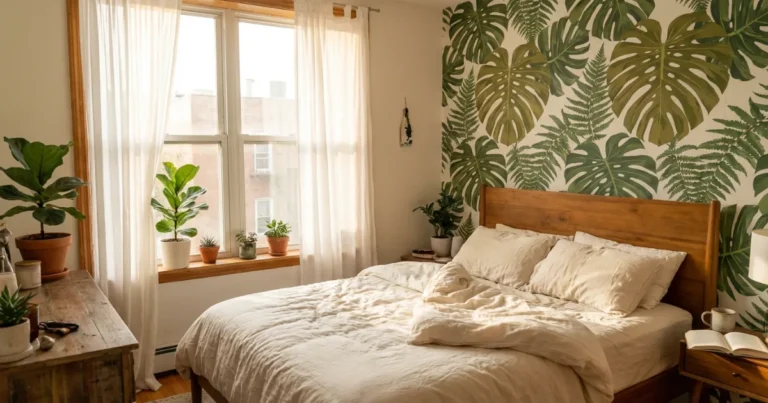
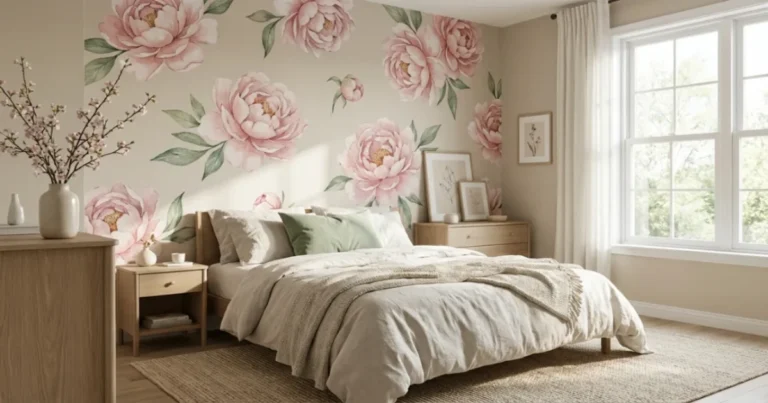
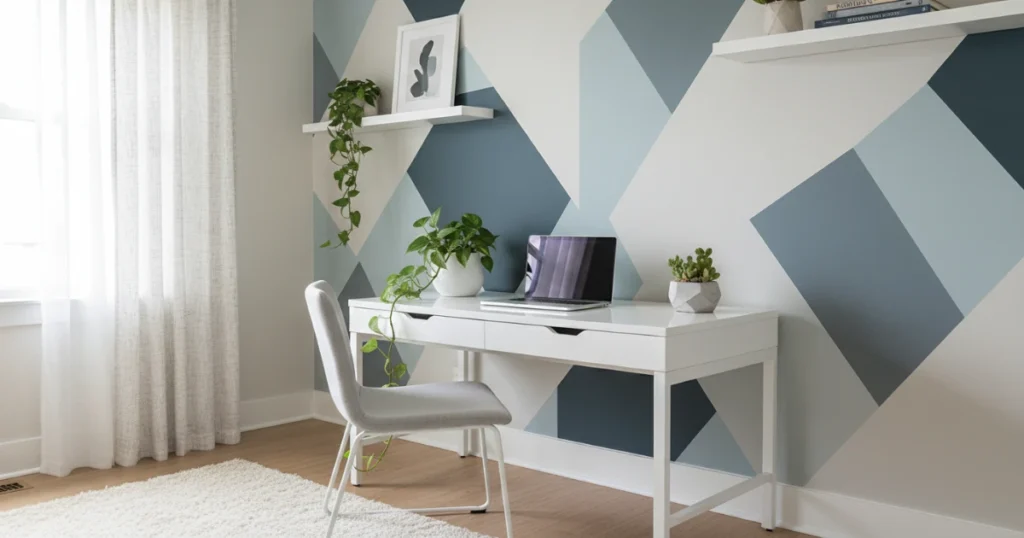
Modular murals, stick border decals, and adhesive wall décors fit bedrooms, offices, kitchens, and even ceilings. Perhaps a nursery is casting soft-cloud murals above, while a home office wall bears subtle line art or a world map.
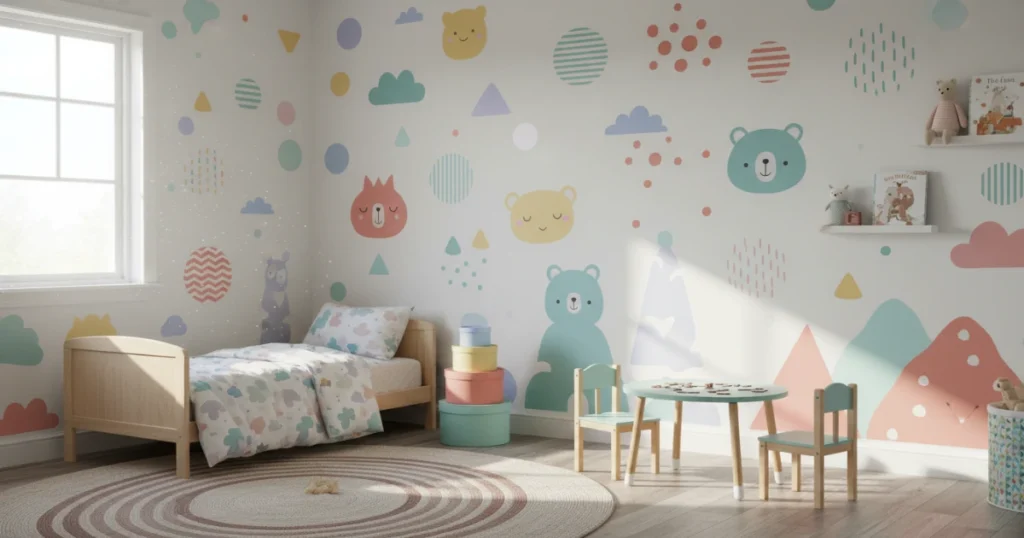
For children, choices include Minecraft hostile mobs peel scenes, unicorns glow illustrations, and abstract confetti, suiting a variety of ages and aesthetics. They even offer seasonal and event themes! A reading corner can utilize book nook shelf multicolor wall decals, while a playroom adds rainbow dots and clouds wall art kit for a brilliant base layer.
Users frequently combine tile panels, wall monkeys decals, quote strips, and custom mural pieces to create a layered effect that is personal yet simple to switch out later.

4. Temporality
Removable wall murals, temporary wallpaper, and repositionable peel products fit temporary displays and changing styles. They wear well for multiple years with typical maintenance. The majority can be removed without scarring, benefiting renters, students, or anyone who relocates frequently.
Since removal is clean, these decorations rock for parties, pop-up events or guest rooms that need a quick theme. A lot of us keep extra rolls or sample peels around, so we can swap in new colors for holidays, then revert back to neutral when necessary.
5. Creativity
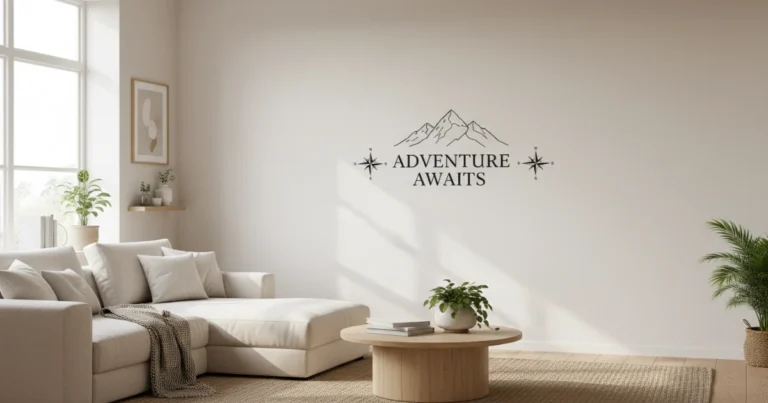
Peel and stick décor doubles as an easy design kit, especially with vibrant wall decals that can be customized. Design your own walls by stacking modular mural peel pieces, then insert your go-to heroes such as Sonic, Goku, or Shrek for a story wall with dimension in the game or media room. Wall quote decals and bold stick wallpaper bring color and short, positive lines that can help calm or energize a home office or entry, creating a cheerful color atmosphere.
In children’s rooms, stick wall decal sets, vibrant peel shapes, and playful themes transform plain walls into education or play canvases. A galaxy kit flung over a bed, animal silhouettes by a desk, or number and letter stickers in a playroom compel kids to look, point, and converse. The magic wall decals can truly inspire creativity.
Adults can test layouts and color mixes with low risk. They can try a vertical stripe of pattern behind a shelf and then add small accent decals on nearby doors or cabinets. Leftover decals don’t often end up in the trash, especially with versatile designs available.
Smaller pieces go onto notebooks, laptop covers, toy boxes, planters or window sills, which helps carry a theme across the room without any additional big-ticket spending. Peel and stick wall coverings endure for years on quality surfaces, and because they remove cleanly when it’s time, they provide both steadfast style and flexibility.
What Surfaces Work Best?
Peel and stick wall decals require a solid, smooth foundation. The smoother and less porous the surface, the more powerful and long-lasting the adhesion of the stick wall decal set. A quick rule is that smooth, clean, dry, and sealed surfaces work.
| Surface Type | Ideal / Challenging / Unsuitable | Notes |
|---|---|---|
| Painted drywall (satin/semi-gloss) | Ideal | Smooth, stable, easy to adjust tiles and decals |
| Glass, ceramic tile, acrylic | Ideal | Nonporous, very smooth, excellent long-term adhesion |
| Metal (non‑rusted), laminate, plastic | Ideal / Challenging | Works well when degreased and fully dry |
| Sealed concrete or plaster | Challenging | Needs sealant or primer; test first |
| Textured walls, orange peel, light stucco | Challenging | Patch test; may need primer or skim coat |
| Raw brick, rough concrete, stone | Unsuitable | Too uneven and porous; poor bonding |
| Fabric, carpet, soft panels | Unsuitable | Flexible and fibrous; adhesive cannot grip properly |
Ideal Surfaces
Smooth nonporous surfaces provide the best results. Painted gypsum board (drywall) with a satin or semi-gloss finish tends to be the safest, as the surface is flat, sealed, and a little slick, so you can slide tiles or decals into position before you press them down. Gloss paint can work well too, provided it is fully cured and not peeling.
Glass, ceramic tile, and acrylic mirror stickers preserve peel and stick décor beautifully, as they are dense and nonporous. The same applies to laminate cupboards, non-rusted metal panels, and most plastic surfaces, as long as you clean off any grease, soap film, or silicone residue beforehand.
Sealed or painted smooth wooden boards can work too. They provide a sturdy, simple-to-clean foundation that goes well with peel and stick tiles and larger wall panels. To ensure the best adhesion, simply wipe the surface with a mild cleaner, rinse it, and let it dry completely.
Any dust, hand oil, or cooking residue will sit between the wall and the adhesive and reduce the longevity of the décor.
Challenging Surfaces
Textured walls can create air gaps underneath the adhesive, making it challenging to apply stick wall decals effectively. Surfaces with light “orange peel” texture, stone effects, or rough plaster often experience edges pulling away or chunks falling off after a few years, especially in high-traffic hallways. Wallpaper can also be tricky since seams and printed textures prevent full contact, and some adhesives may pull the paper when removed.
Bare brick, unsealed concrete, and rough block walls present even greater challenges. These surfaces are porous and undulating, causing the adhesive to seep in rather than remain on top. If you must work with mildly textured or concrete walls, sealing with an appropriate primer or latex-based product can help create a smoother, less absorbent film ideal for wall decals.
Conducting a patch test in a discreet corner is essential on any textured surface. Carpet, fabric wall panels, and other soft or flexible materials typically do not hold up well against modular mural peel décor, as they shift and compress beneath the glue.
Environmental Factors
Room conditions either reinforce or gradually erode the connection. High humidity, frequent condensation, or big temperature swings can deteriorate most pressure-sensitive adhesives, leading to corner curling. Most bathrooms, kitchens, and laundry rooms are in this danger zone, particularly if they do not have consistent ventilation. To enhance your space, consider using stick wall decals that can withstand these conditions.
Avoid damp or recently painted walls until fully dry and cured. Moisture behind the surface can pop tiles off or cause mold. Dust, cooking grease, or airborne grime settles, so surfaces near stoves, open windows, or busy entrances might require more regular sprucing up before you add your new wall art kit. Choosing the right wall decal set can make a significant difference in maintaining the aesthetics of your room.
Before choosing peel and stick products, it helps to review each room: note humidity levels, sunlight exposure, and how often the walls are cleaned or touched. This straightforward checklist minimizes surprises and steers you toward the right product for each surface, ensuring that your modular mural peel fits perfectly into your home decor.
Are Peel and Stick Wall Decorations Removable?
The majority of peel and stick wall decorations—be they vinyl decals, wallpaper panels, or stick-on tiles—are engineered to lift off without leaving a mess. They employ pressure-sensitive adhesive that adheres well but peels away when you pull back the liner, so you can transform a room without scraping or sanding.
On smooth, well-painted walls, such as satin or eggshell paint on drywall, many people take them down completely clean, which is why they’re so effective in rentals, dorms, nurseries, and short-term offices. Still, removability always depends on the wall itself. Rough plaster, old flaking paint, or damp surfaces raise the risk of residue or minor damage, so it pays to read the packaging and follow the maker’s removal directions before you start.
The Removal Process
For optimal results, removal should be gradual. Begin at a loose edge or corner, lift it with a fingernail or plastic card, and then peel the sheet back over itself at approximately a 45-degree angle. This angle maintains low stress on the paint layer and helps the adhesive release instead of tearing or snapping back.
A simple checklist keeps the process smooth:
- Check the product label for any special removal notes.
- Ensure the wall is dry and at room temperature, which is approximately 18 to 24 degrees Celsius.
- Wait at least 21 days after initially adhering the product before removing so the adhesive has time to set in a stable way.
- Lift a small test corner in a low‑visibility area.
- Peel gently at a 45-degree angle, taking breaks if you encounter stubborn resistance.
- If necessary, warm the surface with low heat from a hair dryer to loosen the adhesive.
- Once removed, wipe the wall down with a damp cloth or spot clean any residual tacky spots with a small amount of isopropyl alcohol on a soft cloth.
Tiny remnants of glue are to be expected on certain walls, particularly older ones, but they typically clean off with gentle wiping. Avoid abrasive scrubbing pads or strong solvents because they can do more damage to the paint than the decal itself.
Potential Damage
Damage is not typical for quality peel and stick décor on sound, cured paint. However, it can occur when conditions are sub-optimal. Abrupt, high impact pulling or twisting is more likely to lift paint, and cheap or ultra-thin paint jobs come off sooner than premium ones, with a good primer underneath.
Risk increases on slippery bases. If you apply decals to existing wallpaper, old or chalky paint, or moisture-wicked walls, the sticker could adhere inconsistently and leave stains behind when you peel it off. On very old walls with hairline cracks or previous patch jobs, the decoration can latch on to weak areas and rip them away.
To minimize surprises, check a corner or spare piece in an inconspicuous location before removing a full mural or a lengthy strip of removable wallpaper. If any little scuffs or chips appear after you pull it off, a light sand and a dab of touch-up paint generally restores the wall to a clean finish.
Repositioning Reality
Most peel and stick products, particularly vinyl designs and high-end removable wallpapers, can be moved during the initial few minutes after application. You lift an edge, slide the piece a bit, and press it back down as you adjust alignment, pattern matching, or a minor tilt.
This short ‘grace period’ is built into a lot of products and is convenient when you are aligning multiple panels along a broad wall. That initial independence has its restrictions. With every peel and stick, you take along dust, skin oils and micro-paint flecks on that sticky side.
After a couple of repositions, the glue can lose its holding power and the edges might begin to curl or won’t stay down flat, especially on damp walls or in proximity to a kitchen or bath. Light tweaks are fine. Full re-hanging again and again is less reliable.
For minor touch ups, it’s best if you just lift the section that requires assistance and flatten air pockets outwards by hand or with a soft squeegee, pressing firmly along margins and seams. This keeps the majority of the adhesive virginal and stronger longer.
To minimize rearranging, map out your layout before you peel the backing. Mark the anchors with painter’s tape, level or measuring tape to locate straight sight lines and step back to observe overall balance on the wall. Thoughtful application, along with tender loving care, makes peel and stick décor removable and low risk in the majority of homes and offices.
A Guide to Flawless Application
Clean, dry, and smooth walls are the foundation of any peel and stick wall decals adventure. Adhesive must have complete contact with the substrate, as dust, oil, or peeling paint can interrupt that bond, resulting in premature lifting. A brief prep session and an easy checklist save time later and reduce the risk of misalignment, bubbles, or wasted wall decal set panels.
Surface Preparation
Wipe the wall with a damp lint-free cloth and dry it completely before you consider peeling any backing paper. Even a thin layer of dust or drywall powder can come between that glue and that wall, so be mindful of those corners, baseboards, and the area near switches or sockets where the gunk accumulates.
For kitchens, entryways or other frequently touched locations, wipe away grease and fingerprints with a gentle cleaner or a solution of water and a few drops of dish soap. For more stubborn marks, a little isopropyl alcohol on a soft cloth cleans nicely. Always test a small patch first to make sure it doesn’t dull the paint.
Loose or flaking paint needs to be scraped off because the decals will pull the weak layer later. Putty any nail holes or dings and sand once dry so the wall is smooth to the touch. Rough patches can peek through thin vinyl and break the seal at the edges.
If the wall was painted recently, wait a minimum of two weeks to allow the paint to cure. Decals adhere best to flat, matte, or eggshell paint. Very slick or heavily textured surfaces, like orange peel or brick, tend to provide weaker adhesion and more noticeable seams.
Application Technique
Design your layout before you do anything else. Tape measure the wall height and width, mark light guide points with pencil, and use a level to create straight lines. This is particularly important for tile-look panels or grid layouts.
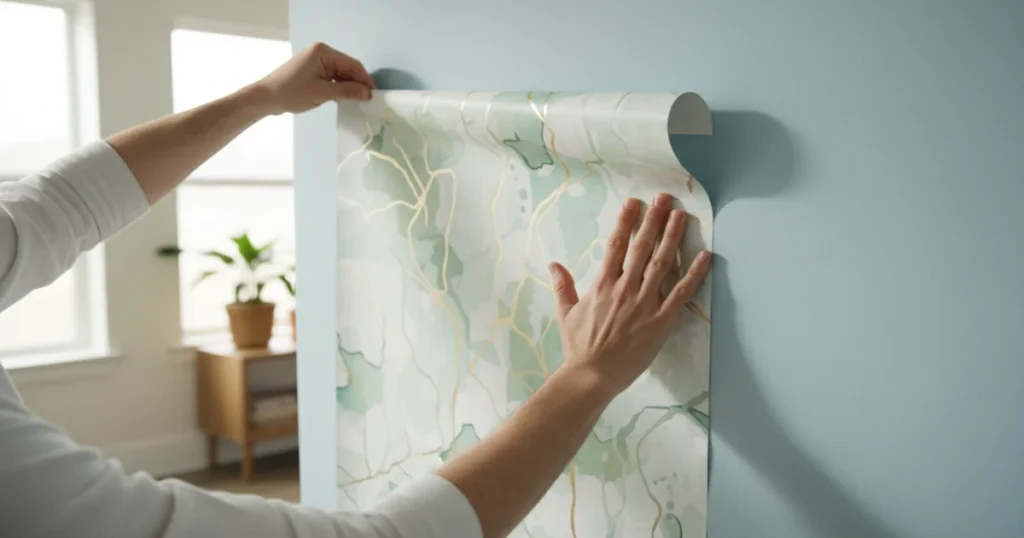
Begin along one edge or corner. Peel a small strip of backing, line up the top and press the exposed glue to the wall. Work slowly across, keeping tension light so that you don’t stretch the vinyl.
Take a squeegee, soft cloth, or credit card wrapped in a cloth and smooth out from the center to the edges. That squeezes out air bubbles and helps the decal lay flat, enhancing long-term adhesion.
If you’re installing giant murals or modular panels, remove the backing in pieces, not in one big go. Rinse after each, pat dry, and smooth before you repeat. Peel the back slowly, as quick yanks can stretch thin areas of the design or even rip.
Once everything is down, try not to move or lift edges for a couple of hours while the glue settles. In steamy spaces such as bathrooms, power a fan or dehumidifier after installation to assist the bond set and reduce the potential for moisture damage.
Common Mistakes
Sticking to dirty, damp, or freshly painted walls is one of the primary causes behind early decal failures. Moisture beneath the film or soft uncured paint compromises adhesion and causes bubbling or corner peeling in days.
To hurry this process causes troubles. Skipping measurements, eye-balling the level, or trying to press down a big sheet in one motion frequently results in crooked lines, trapped air, and deep wrinkles that are difficult to smooth out without re-laminating the entire piece.
Stretching” vinyl to ‘make it fit’ another crack is another common problem. Tugging too effortfully can distort fonts, dislodge designs and stretch the glue surface so it adheres poorly. Instead, cut with a sharp knife or scissors if you need to resize.
Not all walls were created equal. Check texture and paint type before you go. Try a small sample decal on an out-of-the-way spot to test how well it sticks and how cleanly it comes off.
Don’t peel up and reposition your primary design multiple times. Each lift introduces dust to the adhesive and reduces its bonding power.
Beyond the Basics: Creative Uses
Peel and stick wall decals are about more than just filling bare walls. With some forethought, that same roll of peel and stick wallpaper or a few sheets of stick wall decals can tie furniture, appliances, and little accessories together into one obvious but effortless look.
Furniture Upcycling
Old dressers, desks, and bookshelves frequently have sturdy frames but worn finishes. Cover drawer fronts with faux wood stick tiles to mimic oak or walnut, or line the back panel of a bookcase in terrazzo peel and stick wallpaper so the shelves border a dramatic pattern rather than a boring board.
Give second life to second-hand side tables or nightstands with peel and stick tiles that don’t require sanding, staining, or painting. A fool-proof method to get your theme going is to duplicate the same peel and stick pattern on a cabinet, open shelves and a nearby door.
For instance, a plush geometric print can lie on a desk top and then echo inside a storage unit, so the space feels intentional, not haphazard. You can mix and match styles. Match clean, classic subway sticktiles on cabinet fronts with brighter, colorful peel in desk drawers or on shelf edges.
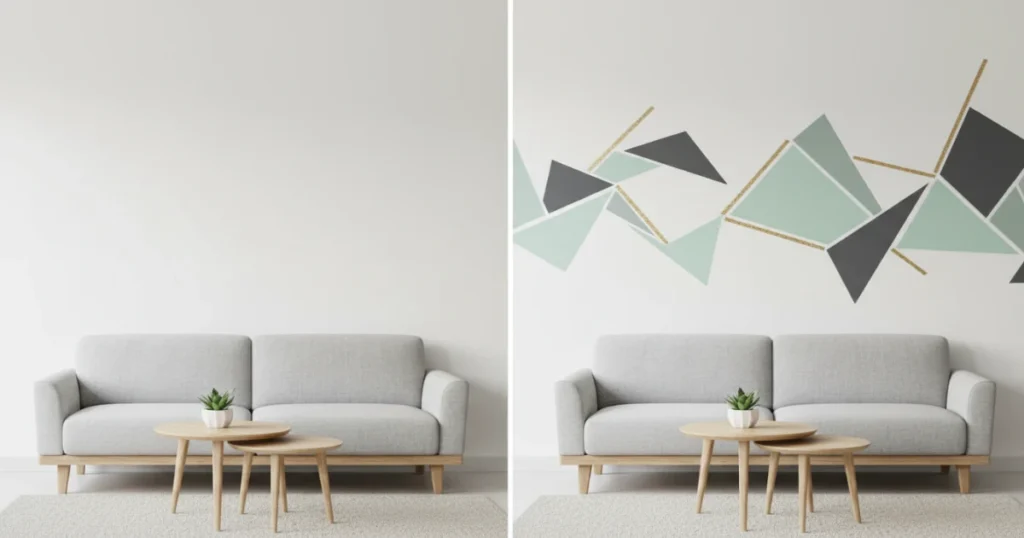
Apply geometric peel on just one or two panels for contrast, rather than each one. To monitor what works, maintain a compact before-and-after photo table in a notes app or document, cataloging the furniture style, finish applied, and its longevity. This record assists in making better decisions for your next project.
Appliance Makeovers
Refrigerators, dishwashers, and washers can enjoy stick wall decor. Personalize your kitchen in style with vinyl decals in matte black, brushed metallic, or subtle patterns that can tone down mismatched appliances and coordinate them with a kitchen backsplash or countertop.
Peel and stick wallpaper with terrazzo, geometric prints, or Moroccan-inspired florals can mirror colors in nearby tiles or dishes, so the space feels connected. Prep is more important on appliances than on wood. Wipe down with a degreaser, rinse, and dry completely.
No oil or polish residue or your tape won’t stick. For renters, removable backsplashes or stick-on backsplashes behind the stove or sink give the look of tile without grout. Match the same pattern on a skinny panel of the fridge door or even a small tech accessory, such as a tablet cover resting on the counter, to bring it all together.
Leftover strips can line the inside of cabinet doors for a little delight every time they swing open.
Temporary Art
Temporary art is where peel and stick materials show their most versatility. A boring wall becomes a pop-up gallery with removable wall murals, wallpops wall art, or a custom mix of decal pieces in grids, clusters, or loose “salon wall” arrangement.
Since peel and stick wallpaper can be swapped out as often as you like, it is a good fit for those apricots who like to reinvent the room every single year. For a theme party or a holiday or an event in the classroom, stick wall decals can set a complete scene.
Use tiles to bring color and theme to a room at a special event, like vibrant patterns for a birthday or subdued ones for a black tie dinner. Cut wallpaper into holiday wreaths, stars or simple Christmas decorations and layer them on doors, mirrors or stair risers.
Chalkboard or whiteboard decals bring an interactive element to studios, kids’ rooms or home offices. They transform flat walls into erasable blank canvases for doodles, reminders or team plans and can be bordered with thin strips of decorative peel for a clean edge.
For keeping displays fresh, assemble a rotating art collection from a wall art kit and spare pieces of wallpaper. Organize flat panels by pattern and size, and then trade sets seasonally. Use cool tones for winter, warm tones and florals for spring, and bold graphics for quick projects.
Even little bits and pieces can decorate vases, storage boxes, or laptop lids, so not a thing is wasted.If you want a more personal look (names, quotes, shapes, or custom layouts), try customizable wall decor stickers that can be designed around your exact wall size.
The Hidden Impact of Your Choices
Peel and stick wall decals might seem simple, but the choice of material, adhesive, and packaging can significantly impact indoor air quality, the planet, and the longevity of your space. Safety, environmental footprint, and durability are as crucial as the vibrant color and dynamic design.
Material Safety
Good peel and stick wall decals and wallpapers ought to be designed for indoor use and comply with fundamental safety standards. Watch for obvious marks such as “phthalate-free,” “BPA-free,” and “tested for indoor air quality.” Non-toxic, phthalate-free vinyl or PVC-free films reduce the amount of harmful off-gassing, particularly in small rooms with minimal ventilation. The right wall decal set can enhance this environment while ensuring safety.
Adhesives and inks are as important as the film. Low-VOC adhesives and water-based inks are better choices for nurseries, bedrooms and playrooms, where you breathe the same air for hours. This comes in handy when you’re already facing other VOC offenders, like furniture finishes or cleaning products.If you want safer materials and better adhesion, compare our shortlist of the best peel-and-stick wallpaper brands before you buy.
Unknown or super cheap off-brand products are a gamble. They will use harsher plasticizers, heavy metal pigments, or allergenic glues, even if the pics online are gorgeous. If in doubt, default towards brands that publish safety data, meet EN or ASTM standards, or possess third-party labels like GREENGUARD Gold, OEKO-TEX, or other regional certifications.
Shortlists from major retailers highlight “certified safe” children’s lines, nursery decals, and peel-and-stick wall coverings. These are good rules of thumb if you want peace of mind without scanning technical sheets for every roll, especially when selecting vibrant color designs for your child’s space.
Environmental Footprint
Peel and stick décor is marketed as a no-mess improvement, but it’s wasteful, too. The film, release backing paper, and packaging really do add up, particularly if you like to freshen walls regularly. Selecting recyclable cardboard boxes, paper padding versus plastic, and backing paper that can be later put into paper recycling reduces the burden.
A few makers opt for water‑based inks and attempt to reduce energy and water consumption during printing. A couple convert to PVC‑free films or bio‑based adhesives for a smaller footprint. This won’t make a project a zero‑waste makeover, but it shifts it for the better, like choosing sustainable wood furniture over disposable pieces.
Below is a simple comparison of more responsible options:
| Option type | Film material | Inks / adhesive | Packaging |
|---|---|---|---|
| PVC‑free wall decals | Polyester / PP | Water‑based, low‑VOC | Recyclable cardboard, paper |
| Phthalate‑free vinyl wallpaper | Soft vinyl | Water‑based, low‑VOC | Mixed; check for less plastic |
| Eco “repositionable” wall films | Polyester blends | Removable, solvent‑free | Often compact, minimal plastic |
When you’re comparing products, consider how long you’ll have the design. If you chase rapid social media fads, you’re swapping out pieces frequently, generating more waste and shipping pollution. A more timeless pattern, selected with your own lifestyle in mind, typically changes less and impacts less over time.
Long-Term Durability
Long-lasting vinyl graphics and premium adhesive wall art, such as stick wall decals, resist fading and stay put even in high-traffic areas like hallways, home offices, and rented living rooms. Quality cosmetics don’t fade in indirect sunlight either and therefore maintain their hue, avoiding clashes with your complexion or outfit on camera, as very harsh or neon colors tend to do.
In kitchens, bathrooms and laundry rooms, waterproof peel and stick luxury wall tiles or branded “sticktiles” wear better near sinks and splash zones. They withstand steam, light splashes, and daily wiping better than flimsy, paper-like stickers that go viral but flake off quickly in real life. This prevents the need for continuous re-application and is a real time and money saver.For kids’ rooms, nurseries, and offices, these removable wall decals themes make it easy to match your space without committing to paint.
Surface prep has an enormous impact on life expectancy. Wash walls with a mild detergent, dry them, and repair any kind of loose paint prior to application. An impervious, sealed surface allows glues to adhere uniformly and inhibits bubbles and premature lifting, particularly in sunrooms or humid cottages.
Checking edges and corners every few months requires little effort and can stave off larger failures. If you find lifting next to showers, radiators, or dusty places, push them back after cleaning or trim and replace individual tiles rather than the entire set.
It’s this type of care that transforms a stylish concept into a useful, permanent element of your space instead of a passing fling, especially when using a wall decal set that reflects your personal style
Smooth walls provide the optimal stick and clean peel. Care with prep and slow, firm pressure maintains flat, clean edges. A little test patch at least saves time and expense later.
Smart picks eliminate waste and noxious fumes, so your space looks great and is healthy.
Frequently Asked Questions
Are peel and stick wall decorations safe for rental walls?
Most good peel and stick wall decals are designed for renters, as they typically come off painted, smooth walls cleanly without residue. Always try a discreet spot first and heed the brand’s recommendations to protect your paint and security deposit.
What surfaces are not suitable for peel and stick wall decorations?
For optimal results with stick wall decals, apply them to clean, dry, smooth, and fully cured surfaces. They won’t adhere to textured walls, brick, concrete, raw wood, or damp and dusty walls, which can hinder the vibrant color and design.
How long do peel and stick wall decorations typically last?
If installed correctly on a suitable surface, stick wall decals can last a few years. Their longevity varies by product, room humidity, and the frequency of wall contact and cleaning, especially in high-traffic areas compared to bedrooms or home offices.
Can I reuse peel and stick wall decorations after removing them?
Most peel and stick wall decals aren’t multi-use. Once removed, the adhesive typically loses its power or picks up dust. A few high-end wall decal sets might be repositionable, but not legitimately reusable once completely removed.
Are peel and stick wall decorations safe for children’s rooms and nurseries?
Several of the brands utilize non-toxic, PVC-free, and low-VOC materials for their stick wall decals, making them safe for kids’ rooms. Be sure to verify product labels for safety certifications and adherence to international standards. WARNING: Do not apply near cribs where babies can tug or chew on them!
How do I clean walls with peel and stick decorations on them?
To maintain your wall decals, take a soft, slightly damp cloth and gently wipe the surface. Avoid strong chemicals, scratchy sponges, or heavy scrubbing, as these can erode the print or weaken the adhesive on your stick wall decals.
Will peel and stick wall decorations damage my paint when removed?
When applied to clean, fully cured paint, most good wall decals come off unharmed. However, paint can peel if the wall was not primed, if the paint is old or flaky, or if it was damp. For less risk, peel at a low angle slowly and warm the adhesive slightly if necessary.
Final words on Peel and Stick decoration
Peel and stick wall decorations offer tangible transformation with minimal risk and minimal hassle. An empty wall becomes a crisp pattern, soft texture, or statement shape in less than an hour. No tools. No extended mess. No paint stress.
Ready to give it a try. Take it one wall, one small corner at a time. Experiment with a single set of peel and stick bits and watch how soon your room feels more like ‘you’.