Can You Use Command Strips on Textured Walls? A Renter’s Honest Guide
What works, what doesn’t, and how to hang art without losing your security deposit.
Quick Answer
Yes, you can use Command strips on textured walls — but with important precautions. Success depends on the depth and type of texture, the weight you’re hanging, and proper surface preparation. Lightweight items (under 2 lbs) on mild texture often work well. Heavier items or deep texture require different strategies. Always test an inconspicuous area first, follow the package instructions exactly, and check your lease before making changes.
At a Glance
On This Page
What Renters Need to Know First About Command Strips on Textured Walls
If you’re a renter with textured walls, you’ve probably stood in front of a blank wall wondering how to hang your art without leaving holes. Command strips seem like the obvious answer — they’re removable, no nails required, and widely available. But textured walls change the equation.
The adhesive on a Command strip is designed to bond to smooth surfaces. When you press it onto a textured wall, the strip only makes contact with the high points of the texture. The valleys — the low spots — don’t get any adhesive contact at all. This means you’re working with significantly less surface area than the strip was designed for.
For renters, this creates a double risk: the item might fall (damaging your belongings or the wall), or the strip might be difficult to remove cleanly (potentially pulling off paint or leaving residue). Either way, your security deposit could be affected.
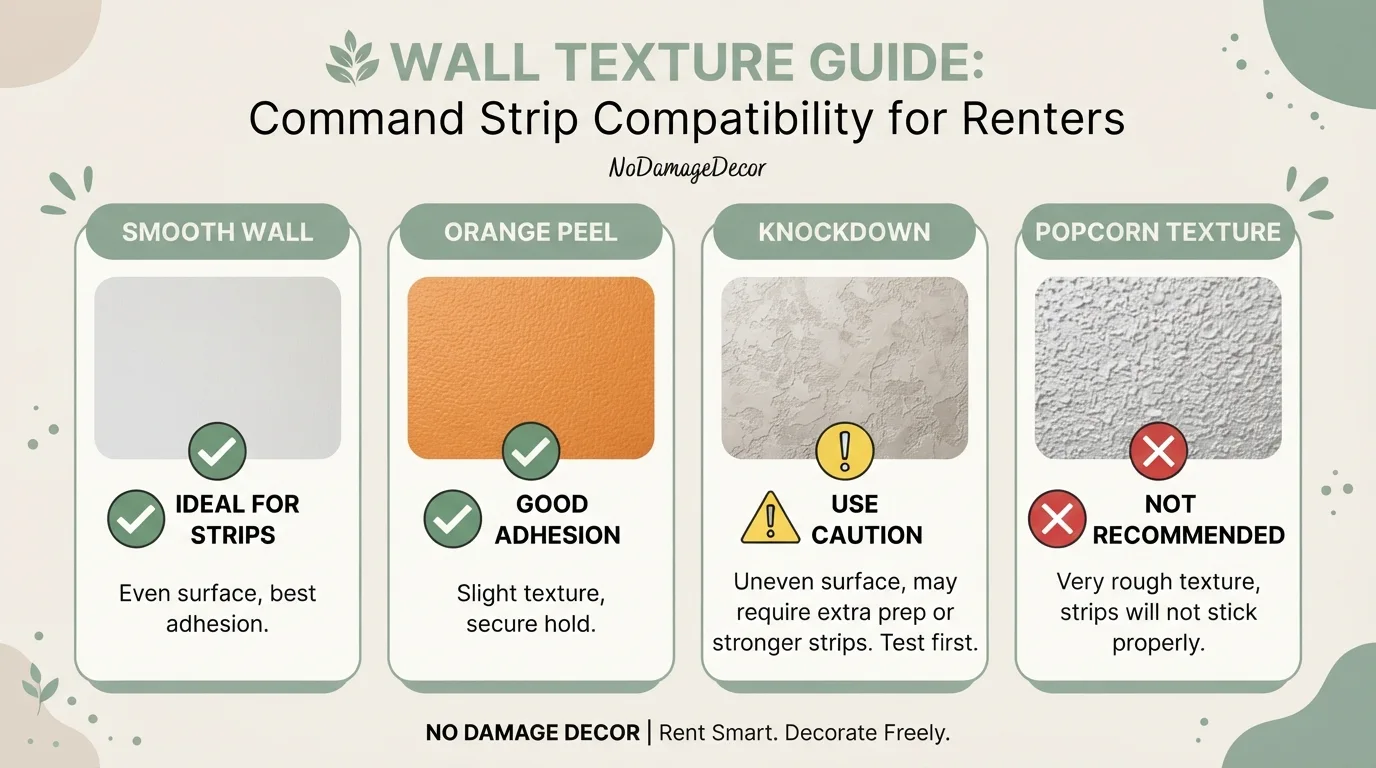
Before you start hanging, take a few minutes to assess your wall texture. Run your hand across the surface. Is it a light orange-peel texture? A heavier knockdown or popcorn finish? Or is it somewhere in between? The more pronounced the texture, the more careful you’ll need to be.
Also, check your lease. Some landlords include clauses that restrict adhesives, especially on textured or older paint. Others are fine with Command strips as long as they’re removed correctly. Knowing your lease terms upfront can save you stress later.
Renter’s Caution
Command strips are not guaranteed to work on textured walls. The manufacturer’s instructions specifically state that textured, porous, or uneven surfaces may reduce holding strength. Always test in an inconspicuous area first and follow the package directions exactly.
Best Low-Risk Approach for Using Command Strips on Textured Walls
After reviewing the available guidance and speaking with renters who’ve navigated this challenge, the most reliable approach comes down to three principles: keep it light, test it first, and remove it carefully.
Renter-Safe Strategy
For textured walls, use the smallest possible Command strip that can safely hold your item — but only for items under 2 lbs. For anything heavier, consider alternative methods like hanging art without nails using leaning or standing displays.
The best low-risk approach starts with choosing the right strip. Command makes several types, but for textured walls, you want the large or jumbo sizes because they have more adhesive surface area. A small strip on a textured wall has very little contact area, whereas a larger strip spreads the load across more texture peaks.
That said, don’t exceed the weight rating. The rating assumes a smooth surface. On textured walls, you should reduce the effective weight capacity by at least 30–50% as a conservative rule of thumb. So a strip rated for 3 lbs on smooth walls should only hold about 1.5–2 lbs on textured walls.
If you have a choice between multiple small strips or one larger strip, opt for the larger single strip — it provides more consistent adhesive contact across the texture pattern.
Step-by-Step Guide: How to Apply Command Strips on Textured Walls
Follow these steps carefully to give yourself the best chance of success — and to minimize the risk of damage.
1. Clean the wall surface
Wipe the area with a clean, dry cloth to remove dust and debris. For textured walls, dust tends to collect in the valleys, so take an extra moment to brush the surface gently. Do not use water or cleaning solutions — these can leave residues that weaken the adhesive.
2. Test an inconspicuous spot
Before committing, apply a single Command strip to a hidden area like the back of a closet or behind furniture. Leave it for 24 hours, then remove it according to the package instructions. This tells you two things: whether the strip holds on your specific texture, and whether the paint is prone to peeling.
3. Choose the right strip size
For textured walls, err on the side of a larger strip. If the product calls for two strips for your item, use two. Do not attempt to use a smaller strip than recommended — the reduced contact area will compromise the hold.
4. Apply pressure for the full duration
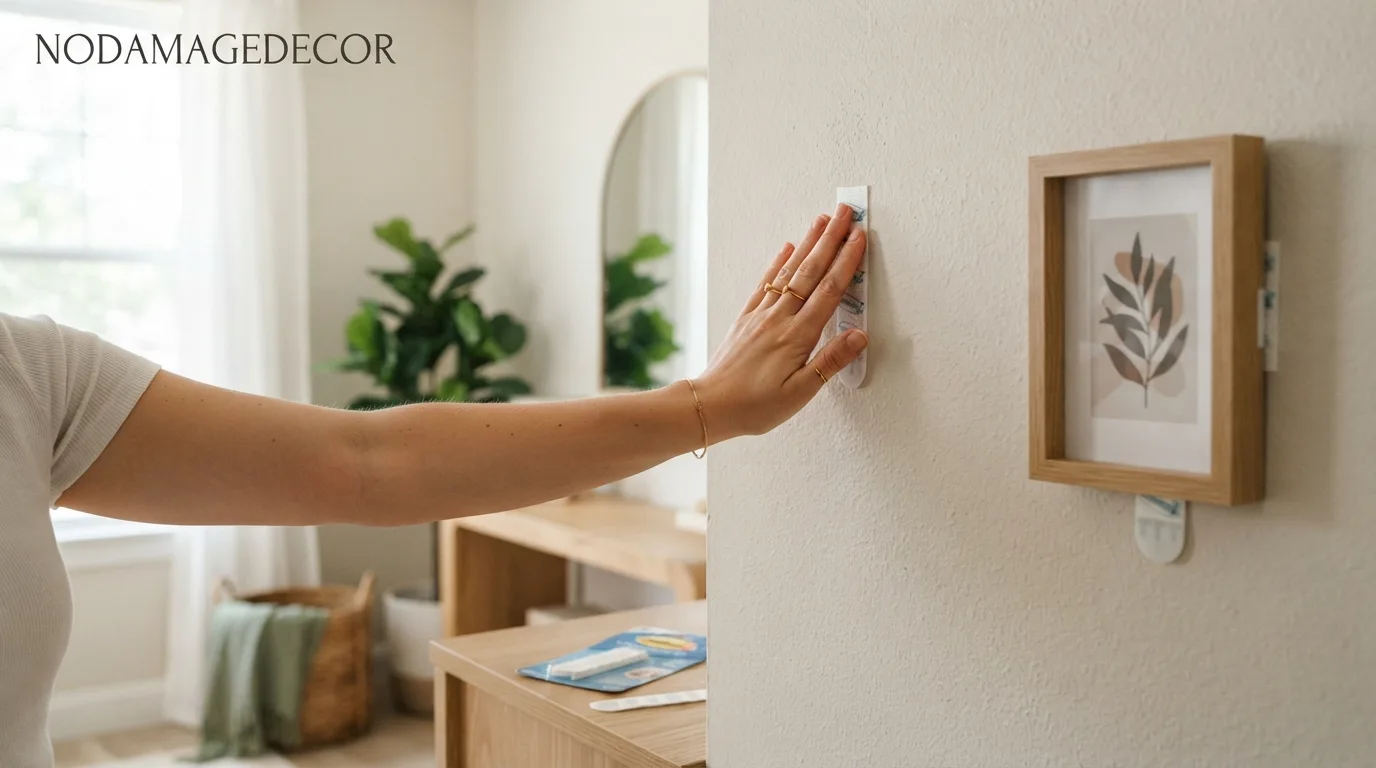
Press the strip firmly onto the wall for the full 30 seconds recommended in the instructions. On textured walls, this is critical — you need to push the adhesive into the texture peaks as much as possible. Use the palm of your hand and apply steady, even pressure.
5. Wait before hanging
Command strips require time to bond. Leave the strip on the wall for at least 1 hour before attaching your item — longer if possible. The adhesive needs to flow into the texture for maximum contact.
6. Attach your item gently
When you’re ready to hang, attach your item according to the product instructions. Press it firmly against the wall and avoid bumping or shifting it after placement.
7. Monitor the hold
Check the item after 24 hours and again after a week. If it feels loose or shifts, remove it immediately and reconsider your approach. Don’t wait for it to fall.
Surface Compatibility & Renter Risk Table
Not all wall textures are created equal. Here’s a quick reference to help you assess your specific situation.
| Surface Texture | Works Better When | Risk Level | Renter Tip |
|---|---|---|---|
| Light orange-peel | Fine texture, minimal height variation | Low–Moderate | Often works well for items under 2 lbs. Use large strips. |
| Medium orange-peel | Strips with foam backing (better contouring) | Moderate | Test first. Consider mounting putty or leaning displays. |
| Knockdown | Lightweight items only (under 1.5 lbs) | Moderate–High | High risk of failure. Explore no-damage wall decor ideas. |
| Popcorn / acoustic | Almost never recommended | High | Avoid adhesives. Use leaning frames or standing shelves. |
| Smooth painted drywall | Ideal — follows product instructions | Low | Follow the package directions; still test first. |
Product & Method Comparison for Textured Walls
Here’s how different Command strip options and alternatives stack up for textured-wall use.
| Product / Method | Best For | Textured Wall Suitability | Renter Caution |
|---|---|---|---|
| Command Small Strips | Ultra-light items (<1 lb) | Low — minimal adhesive area | Avoid on any texture; risk of failure is high |
| Command Large Strips | Frames, lightweight art (1–2 lbs) | Moderate — better with mild texture | Reduce weight rating by 30–50% |
| Command Jumbo Strips | Heavier items (2–3 lbs) on smooth walls | Moderate — more surface area helps | Still test first; texture reduces effective hold |
| Command Hooks (with foam) | Towels, light bags, keys | Low–Moderate — foam contours better | Works better than flat strips on texture |
| Removable mounting putty | Lightweight paper items, posters | Low — best on smooth surfaces | Can leave oily residue on textured paint |
| No-drill leaning displays | Frames, art, shelves | High — no adhesive needed | Zero wall risk; uses floor or furniture support |
Renter-Friendly Products for Command Strips on Textured Walls
Command Large Picture Hanging Strips
These large strips offer more adhesive surface area than standard sizes, making them a better choice for textured walls. Rated for up to 3 lbs on smooth surfaces — plan for about 1.5–2 lbs on texture.
Surface caution: Test on inconspicuous area firstCommand Jumbo Utility Hooks
The foam backing on Command hooks conforms slightly to texture, offering better contact than flat strips. These are a lower-risk option for hanging everyday items in bathrooms or entryways.
Surface caution: Avoid on popcorn or deep knockdownRemovable Wall-safe Mounting Putty
For very lightweight items, mounting putty can be an alternative to strips. It molds into texture somewhat, but it’s not suitable for anything with weight. Easy to remove but may leave a slight oily residue.
Surface caution: Test on painted surface first6 Common Mistakes Renters Make with Command Strips on Textured Walls
Avoid these pitfalls to keep your walls safe and your decor in place.
- Not cleaning the wall first. Dust and debris collect in textured surfaces, reducing adhesion. Always wipe the area with a dry cloth before applying.
- Using strips that are too small. A smaller strip has less adhesive to contact texture peaks. When in doubt, go larger.
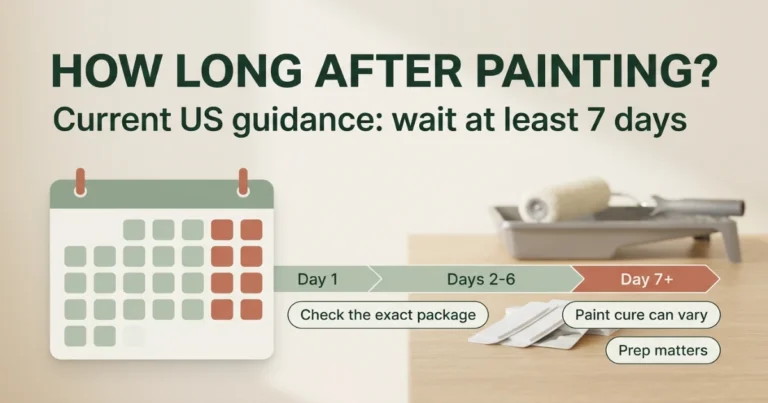
- Applying the strip on fresh paint. New paint can be soft and prone to peeling. Wait at least 2–4 weeks after painting before using adhesive strips.
- Ignoring the weight rating adjustment. The printed weight assumes a smooth surface. On textured walls, you need to derate the capacity — sometimes by half.
- Removing strips incorrectly. Pulling straight out instead of stretching downward can tear paint. Always follow the removal instructions: stretch the strip slowly and parallel to the wall.
- Not testing in a hidden spot first. A quick test in a closet or behind furniture can save you from a costly paint repair.
Safer Alternatives When Command Strips Aren’t the Right Choice
If your wall texture is too deep or you’re hanging something heavier, consider these deposit-friendly alternatives.
Lean your art instead of hanging it
One of the safest ways to display art in a rental is to simply lean it against the wall. Large format frames, canvas prints, and even mirrors can be placed on a console table, shelf, or the floor. This adds a curated, gallery-like feel and completely eliminates wall risk. For more ideas, see no-damage wall decor ideas.
Use picture ledges or floating shelves (no-drill)
Some shelf systems use tension or compression to stay in place without drilling or adhesives. Others can be propped against the wall with weighted bases. These allow you to display framed photos and small objects without any wall attachment.
Explore peel-and-stick wall decals
For decorative accents, peel-and-stick decals and removable wallpaper are designed for rental use. They’re generally lower-risk than Command strips because they distribute weight across a larger area. Check out best peel-and-stick wallpaper for renter-friendly options.
Use standing or floor-based displays
Floor lamps with built-in shelves, leaning ladder shelves, and bookcases all provide display space without touching the walls. These are excellent solutions for renters with highly textured or fragile walls.
If you’re set on wall-mounting and Command strips aren’t working, consider floating shelves without drilling as a more robust but still renter-friendly option.
Move-Out & Removal: How to Remove Command Strips from Textured Walls
Removal is where many renters lose their security deposit. Follow these steps carefully when it’s time to take down your decor.
- Start with clean hands. You’ll need a good grip on the tab.
- Grasp the tab firmly. Find the pull tab at the bottom of the strip.
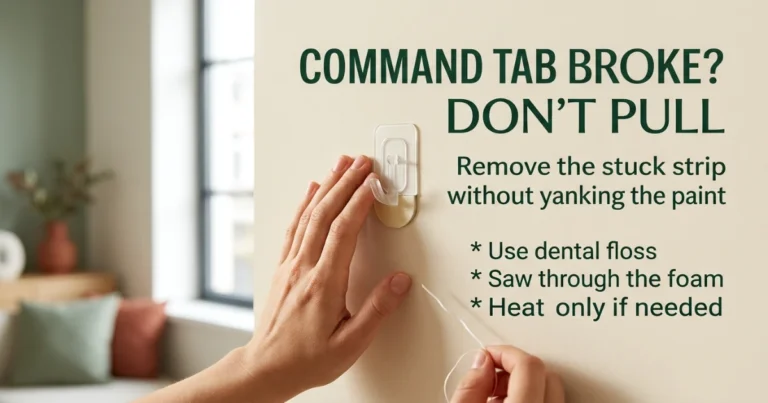
- Stretch, don’t pull. Hold the tab and stretch it straight down, parallel to the wall, as close to the wall surface as possible. The strip should stretch to about 6–8 inches and then release.
- Go slowly. If you feel resistance, stop and try again. Rushing can tear paint.
- If the strip breaks and leaves adhesive behind, use a gentle heat from a hair dryer (low setting) to soften the remaining adhesive before attempting removal.
- Inspect the wall. After removal, check for any residue or paint damage. A very gentle wipe with a damp cloth can remove minor residue — but test in a hidden spot first.
- Document the condition. Take photos before your move-out inspection to have proof of the wall’s condition.
Security Deposit Reminder
If you’re unsure about removal, check your lease or ask your landlord. Some landlords prefer that you leave the strips in place rather than risk removal damage. Always communicate before your move-out inspection.
Sources & Renter-Safety Note
This guide is based on manufacturer instructions for adhesive products, common rental lease terms in the US, and feedback from renters who have navigated textured-wall decorating challenges. Always refer to the specific product packaging for the most up-to-date instructions and weight ratings. When in doubt about your wall’s condition or your lease terms, consult your landlord or property manager.
Frequently Asked Questions About Command Strips on Textured Walls
Do Command strips work on textured walls?
They can work, but success depends on the texture depth and the weight of the item. Light orange-peel textures often work well for lightweight items (under 2 lbs). Deep knockdown or popcorn textures are much riskier and often fail. Always test in an inconspicuous area first.
What happens if a Command strip fails on a textured wall?
If the strip fails, your item may fall, potentially damaging the item itself or the wall surface. The adhesive may also leave residue or pull off paint. To minimize risk, keep items lightweight and test the hold before leaving them up for extended periods.
Can I use Command strips on popcorn ceilings or walls?
We strongly advise against using Command strips on popcorn or acoustic surfaces. The texture is too deep and fragile, and the adhesive is likely to fail or damage the surface upon removal. Use leaning displays or standing decor instead.
How much weight can Command strips hold on textured walls?
The weight rating printed on the package assumes a smooth surface. On textured walls, you should reduce the effective capacity by 30–50%. For example, a strip rated for 3 lbs on smooth walls should only hold about 1.5–2 lbs on textured surfaces. Always err on the side of caution.
Will Command strips damage textured paint?
There’s a risk, especially if the paint is older, soft, or not well-adhered to the wall. The removal process can pull off paint chips. To minimize risk, test in a hidden area first, and always remove the strip by stretching it down slowly, parallel to the wall.
What’s the best alternative to Command strips for textured walls?
For renters with textured walls, the safest alternatives are leaning art displays, floor-based shelving, and no-drill picture ledges. These options eliminate wall damage risk entirely while still allowing you to decorate beautifully. See no-damage wall decor ideas for more inspiration.
Can I use Command strips on bathroom textured walls?
Bathrooms add another layer of risk due to humidity and temperature changes. On textured bathroom walls, Command strips are even less reliable. Consider no-drill bathroom storage solutions or leaning displays instead.
How do I remove Command strip residue from a textured wall?
If adhesive residue remains after removal, try gently warming it with a hair dryer on low heat, then use a clean cloth to roll the residue off. Avoid using solvents or water, as these can damage paint. Test any method in an inconspicuous spot first.
Renter-Safety Verdict: Command Strips on Textured Walls
Our Renter-Safety Assessment
Command strips can be used on textured walls with careful planning, but they are not a guaranteed solution. The risk of failure or damage increases with texture depth and item weight.
Safe When
Texture is light (orange-peel or less), item is under 2 lbs, you test first, and you follow removal instructions exactly.
Avoid When
Texture is deep (knockdown, popcorn), item is heavy (3+ lbs), paint is fresh or fragile, or your lease prohibits adhesives.
Best Next Step
Test a single strip in a hidden spot for 24 hours. If it holds and removes cleanly, proceed with caution. If not, explore leaning and standing decor alternatives.
Deposit-Safety Note
Document your wall condition before and after. If you’re unsure about removal, ask your landlord for guidance — some prefer you leave strips in place rather than risk paint damage.
Ready to Decorate Your Rental Without the Worry?
Explore more renter-friendly decorating ideas that keep your walls safe and your security deposit intact.
Browse No-Damage Wall Decor Ideas