
Command Strips Weight Limit Guide
Compare current picture-hanging limits, frame sizes, surface rules and installation requirements before you trust removable adhesive strips with rental-wall decor.
Quick Answer
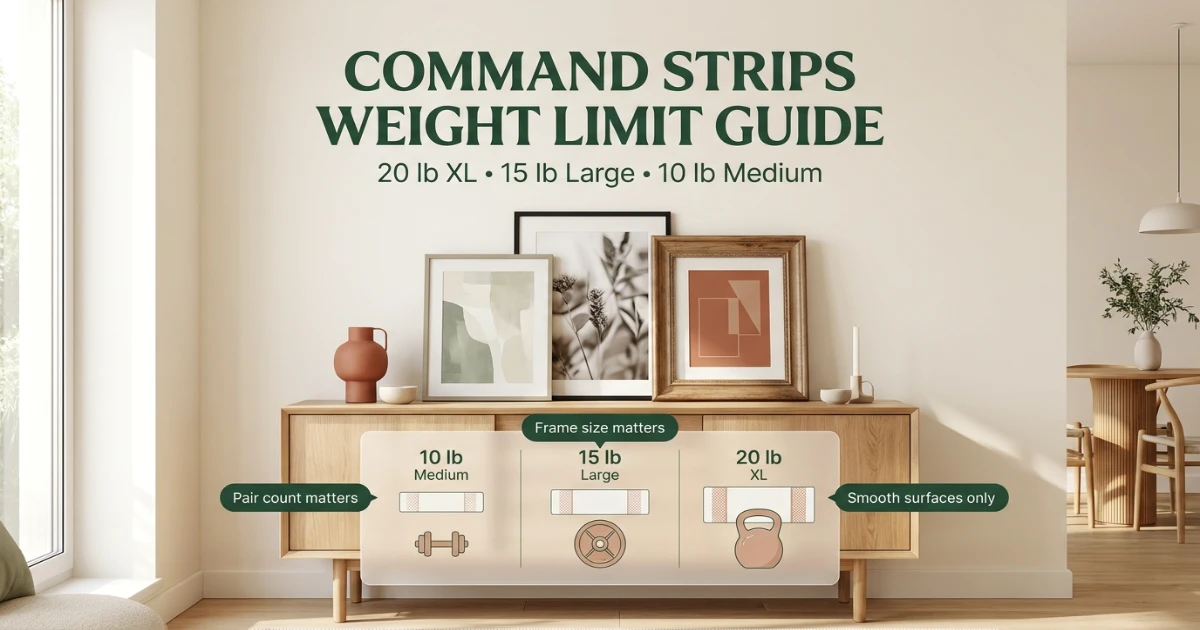
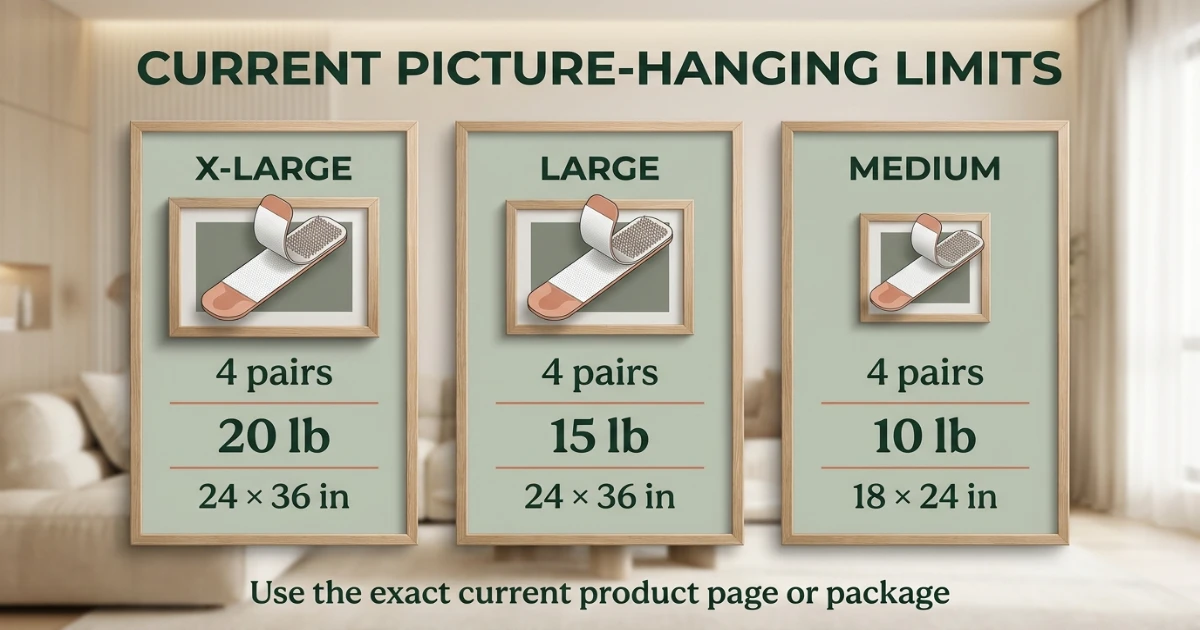
There is no single Command strip weight limit. For current US Picture Hanging Strips, Command lists four X-Large pairs for frames up to 20 lb and 24 × 36 inches, four Large pairs for up to 15 lb and 24 × 36 inches, and four Medium pairs for up to 10 lb and 18 × 24 inches. Command’s general weight-limit guide also presents some capacities per set, so do not multiply a per-set number yourself when the current page or package for your exact product gives a lower multi-pair maximum. Follow the exact product instructions.
Current Top Limit
X-Large Picture Hanging Strips: 4 pairs, up to 20 lb, max frame 24 × 36 in.
Large Strips
4 Large pairs: up to 15 lb, max frame 24 × 36 in.
Medium Strips
4 Medium pairs: up to 10 lb, max frame 18 × 24 in.
Surface Still Matters
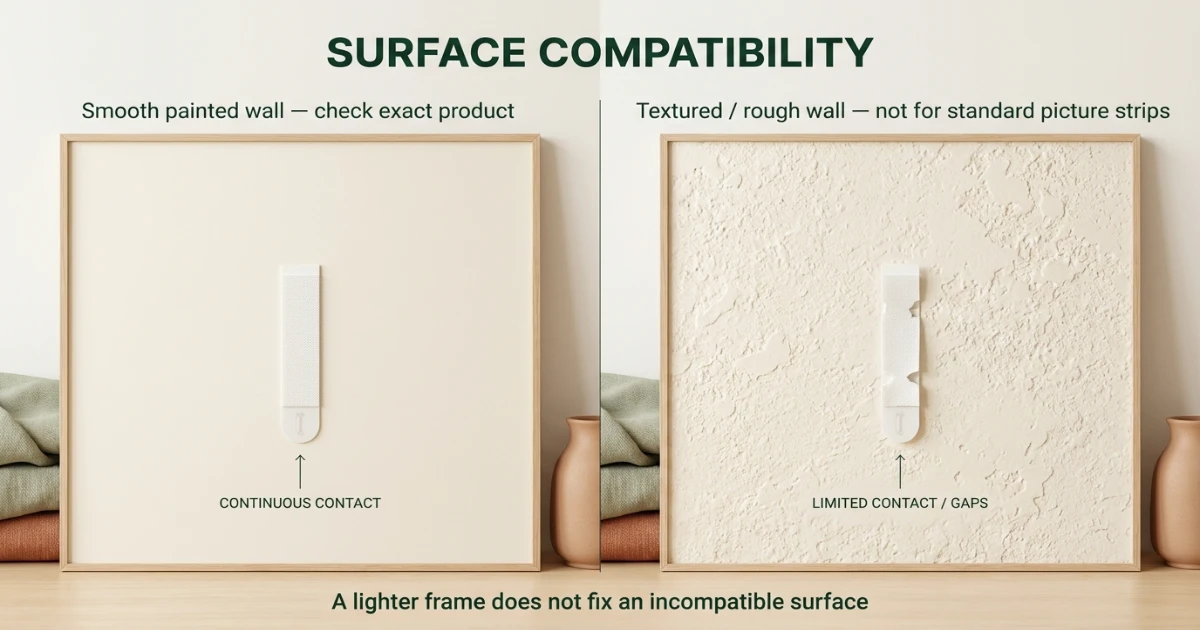
Standard picture-hanging strips are for compatible smooth surfaces, not textured or rough walls.
On This Page
Command Strips Weight Limit Guide: Current Picture-Hanging Limits
The biggest mistake renters make is assuming that all removable adhesive products work the same way. In reality, different products are engineered for different purposes. A strip intended for a lightweight decorative item may not be suitable for a heavy frame, while a picture-hanging system may be designed differently from a utility hook.
Weight ratings apply to specific products and configurations. One detail that can confuse shoppers is that Command’s general weight-limit guide lists some Picture Hanging Strip capacities per set, while newer individual product pages publish multi-pair frame limits. For example, the current Large product page gives a four-pair maximum of 15 lb even though a general guide may show a per-set figure that would add up differently. Use the exact current product page or package as the controlling limit rather than doing your own multiplication.
If your primary goal is avoiding unnecessary repair costs at move-out, focus on the entire installation system rather than the weight number alone: exact strip type, required pair count, maximum frame dimensions, compatible surface, wall condition, application steps and correct removal.
| Current Picture-Hanging Option | Published Configuration | Current Maximum | Maximum Frame Size |
|---|---|---|---|
| X-Large Picture Hanging Strips | 4 pairs (8 strips) | 20 lb | 24 × 36 in |
| Large Picture Hanging Strips | 4 pairs (8 strips) | 15 lb | 24 × 36 in |
| Medium Picture Hanging Strips | 4 pairs (8 strips) | 10 lb | 18 × 24 in |
Important: These are current US product-page limits checked for this article. Other Command products, sizes, colors, hooks and older packages may use different ratings. Check the exact current package or manufacturer page before hanging.
Selection Checklist: Choosing the Right Approach
- Identify the exact weight of the item.
- Check the exact product’s published pair count, total weight limit and maximum frame size.
- Confirm the wall is a compatible smooth surface; do not treat textured or rough walls as a reduced-capacity use case.
- Consider the item’s size and balance, not just its weight.
- Inspect paint condition before installation.
- Avoid assumptions based on a different Command product you used previously.
- Review removal instructions before mounting anything.
For a broader renter-safe strategy, pair this guide with our no-damage wall decor ideas and hang art without nails guides.
How to Use Command Strips More Safely in a Rental
-
Read the exact package instructions.
Different products have different requirements. Do not assume that instructions from another adhesive product apply. -
Evaluate the wall condition.
Loose paint, damaged drywall, peeling finishes or poorly bonded surfaces can increase risk regardless of the strip’s rating. -
Prepare compatible smooth walls correctly.
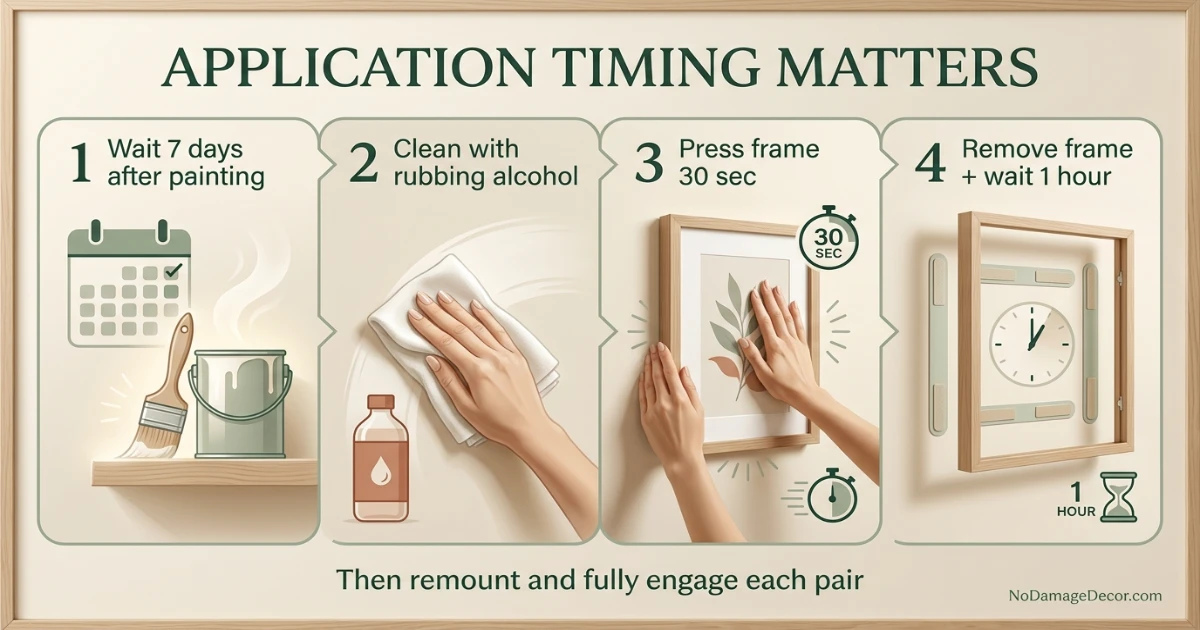
For Picture Hanging Strips, Command says to wait at least 7 days after painting and clean the wall with rubbing alcohol before application. -
Use the recommended quantity and configuration.
Do not reduce the number of strips if the instructions specify a particular arrangement. -
Press and build the bond as directed.
Current Command Picture Hanging Strip instructions include pressing the frame firmly against the wall for 30 seconds, removing the frame, and waiting one full hour before remounting. -
Confirm every pair is fully engaged.
When remounting, align the paired strips and press until they are securely engaged. If the frame shifts, lifts or does not fully click together, remove it and reassess the installation. -
Remove according to instructions.
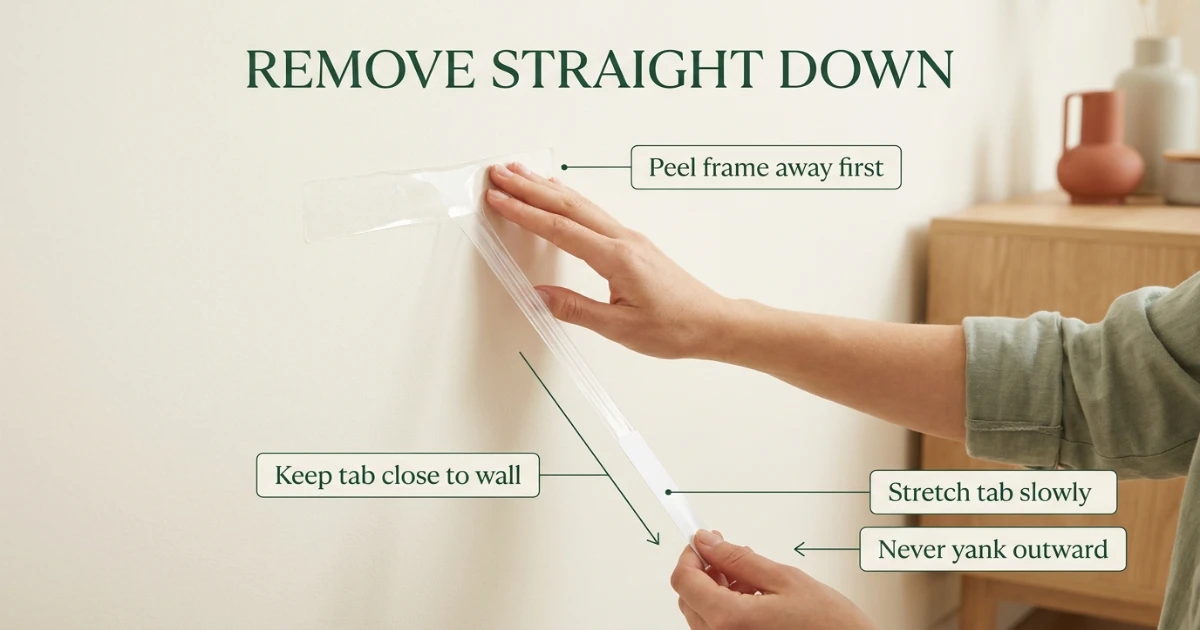
Peel the frame away first, then stretch each removal tab slowly straight down along the wall rather than pulling the strip outward.
If adhesive material remains after removal, use our Command strip residue removal guide. For failed installations, see Command strips falling off wall: fixes.
Which Approach Fits Your Situation?
| Situation | May Be Suitable | Use Extra Caution When |
|---|---|---|
| Light decorative wall art | Picture-hanging products rated for the item | The frame is oversized or poorly balanced |
| Small renter decor accents | Light-duty removable mounting solutions | The wall is textured, rough, fragile or otherwise excluded by the exact product instructions |
| Bathroom or humid areas | Products specifically intended for those conditions | Moisture exposure is frequent |
| Large mirrors | Only when manufacturer guidance specifically supports the application | The mirror is heavy, valuable or fragile |
| Shelves or structural storage | Alternative mounting systems may be more appropriate | Significant load-bearing support is required |
For heavier or awkward items, compare adhesive hanging with alternatives in our hang art without nails guide rather than forcing a strip system beyond its published limits.
Common Command Strip Mistakes and Safer Fixes
Using the Wrong Product Category
A hook product and a picture-hanging product may have different intended uses. Always match the item to the intended application.
Using Picture Hanging Strips on Textured or Rough Walls
Current Command Picture Hanging Strip product pages exclude textured and rough walls. Do not assume that using a lighter frame makes an excluded surface suitable.
Focusing Only on Weight
Weight is only one limit. Current product pages also publish maximum frame dimensions, and the required strip-pair configuration matters. A frame can be too large even when it is under the weight maximum.
Mounting Valuable Items With Adhesive Strips
Command’s current guidance says not to use Picture Hanging Strips for valuable or irreplaceable items. Choose another appropriate mounting method for artwork or objects you cannot afford to lose.
Removing Strips Incorrectly
Many wall-damage complaints occur during removal rather than installation. Proper removal technique is essential.
Renters who want additional wall-decor ideas can also explore these no-damage wall decor ideas and learn how to hang art without nails while keeping wall repairs to a minimum.
What to Look For Before Buying
Because product ratings and compatibility can change between product lines, the safest buying approach is to verify details on the exact package or official manufacturer page before purchase.
- Current total weight limit for the exact strip-pair configuration.
- Maximum frame dimensions and compatible smooth surfaces.
- Application wait time and removal instructions.
- Intended use category (picture hanging, hooks, organization, etc.).
- Warnings related to fragile or valuable items.
- Compatibility with the room where the product will be used.
Avoid selecting a product solely because it appears stronger. The right choice is the one designed for your specific item, surface and room conditions.
Renters should also avoid broader apartment decor mistakes that cost your deposit when planning wall displays and temporary upgrades.
Sources & Renter-Safety Note
This guide is intended as general renter-focused information. Weight ratings, surface compatibility, installation requirements and removal instructions depend on the exact product selected.
- Command — 20 lb X-Large White Picture Hanging Strips
- Command — 15 lb Large Picture Hanging Strips
- Command — 10 lb Medium Picture Hanging Strips
- Command — How to Use Picture Hanging Strips
- Command — Product Weight Limits Guide
If different Command pages or older packaging appear to use different rating formats, use the current instructions for the exact product in your hand. Do not exceed the lower published maximum.
Frequently Asked Questions
Can I trust the weight rating alone?
No. Weight is only one factor. The exact strip-pair count, maximum frame dimensions, compatible surface, paint condition and installation steps also matter. Follow the current product page or package for the exact strip you are using.
Do Command Strips work on every wall?
No. Current Command Picture Hanging Strip guidance excludes wallpaper, textured walls, brick and rough surfaces. Use only on surfaces listed as compatible for the exact product.
Are Command Strips safer than nails for renters?
They can be a lower-risk option in many decorating situations when used correctly, but no method completely eliminates the possibility of wall damage.
Can I use adhesive strips for heavy mirrors?
Only when the exact product page supports the mirror’s weight, dimensions, surface and strip configuration. Do not use Picture Hanging Strips for valuable or irreplaceable mirrors, and do not exceed the current published limits.
What causes most wall damage during removal?
Pulling the strip outward instead of stretching the removal tab slowly down the wall, using strips on fragile or excluded surfaces, and weak paint adhesion can all contribute to damage.
Renter-Safety Verdict
Command Picture Hanging Strips can be useful renter-friendly tools when you treat the published limits as a complete system, not just a weight number. Current US product pages list four X-Large pairs for up to 20 lb / 24 × 36 in, four Large pairs for up to 15 lb / 24 × 36 in, and four Medium pairs for up to 10 lb / 18 × 24 in. The safest approach is to follow the current exact product instructions, use only compatible smooth surfaces, wait after painting, prepare with rubbing alcohol, use the specified pair count, and remove the strips correctly.
Need Help Removing Strips Later?
Proper removal is one of the most important steps in protecting paint and reducing move-out repair concerns.
Read the Residue Removal Guide



One Comment