Command Strips Size Guide: How to Pick the Right Size for Your Rental
A practical, surface-aware breakdown of Command strip sizes, weight ranges, and rental-safe hanging decisions.
Command strips come in small, medium, large, and extra-large sizes, each intended for a different weight range and item type. The right size depends on the object you are hanging, the wall surface, and how long it needs to stay up. For most lightweight frames, hooks, and small decor, a medium strip is a common starting point—but always check the current manufacturer-rated limit for the exact product before mounting anything above a bed, crib, or walkway.
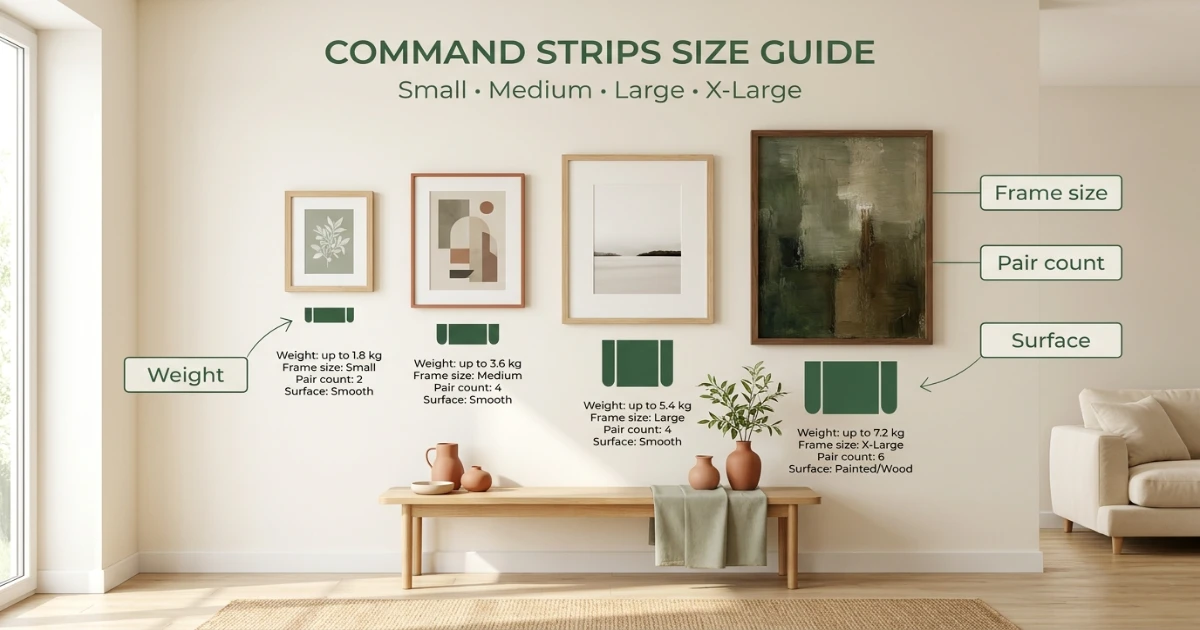
At a Glance
Understanding Command Strip Sizes
Command picture hanging strips are sold in several sizes, but the naming is not always consistent across retailers. The most common categories are small, medium, large, and extra-large. Each size has a different adhesive surface area, which affects how much weight it can support on a clean, smooth wall.
In general, larger strips have more adhesive contact and are rated for heavier objects. Smaller strips are thinner and less visible behind small frames or lightweight hooks. However, the exact dimensions and rated limits can change between product lines, so the package label is always the most reliable source.
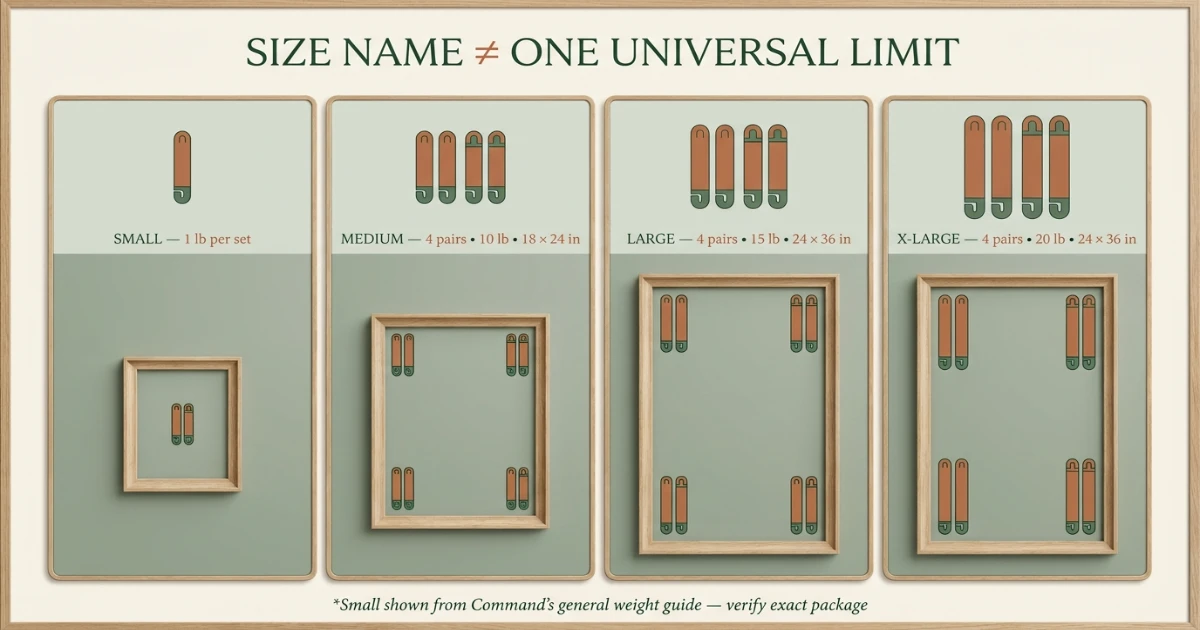
Typical Size Categories
Small strips: Best for lightweight paper items, small photos in lightweight frames, and very light hooks. They are easy to hide but have the lowest weight capacity.
Medium strips: The most versatile for renters. Often used for small to medium picture frames, canvas panels, small cork boards, and lightweight shelves with a rated limit that matches the item.
Large strips: Intended for heavier frames, larger canvases, and medium decorative objects. They provide more adhesive coverage and are often rated for significantly more weight.
Extra-large strips: Used for the heaviest items within the Command adhesive range, such as large framed mirrors or heavy wall art. These should only be used on surfaces explicitly listed by the manufacturer.
These size names are general. Different Command product lines—picture hanging strips, poster strips, and utility hooks—may use different sizing labels. Before buying, look for the specific product name and its rated weight range on the manufacturer’s site or product packaging.
Weight Limits and Load Ratings
Every Command product has a rated weight limit. This number is not a suggestion—it is the maximum the adhesive is designed to hold under the manufacturer’s specified conditions. The actual limit depends on several factors: the strip size, the number of strips used, the wall surface, the temperature, and the installation method.
Because weight limits can vary by product line and packaging updates, this guide does not list specific pound ratings. Instead, follow this decision process:
Before Hanging Anything
Check the current package or manufacturer page. Look for the rated weight limit for the exact product you own or plan to buy. If the rating is not visible on the package, find the product on the official manufacturer website.
Add a safety margin. Do not hang an item that weighs exactly the maximum rated limit. A small bump, temperature change, or imperfect surface can reduce real-world performance. Many renters choose a strip rated for at least 20–30% more than the item’s actual weight.
Use the right number of strips. For picture hanging strips, you often need two or more pairs to reach the full rated capacity. Using one pair instead of the recommended number can cause the item to fall.
If you cannot verify the weight rating, do not guess. Use a different hanging method, such as a low-profile nail with landlord permission, or choose a much lighter item for the location.
Surface Compatibility: Where Command Strips Work and Where They Don’t
Command strips are designed for specific surfaces. Using them on the wrong surface can cause the strip to fail, the paint to peel, or the wall texture to be damaged during removal. This is a major consideration for renters because the wall condition at move-out matters.
| Surface Type | General Compatibility | Renter Considerations |
|---|---|---|
| Painted drywall (smooth or lightly textured) | Often compatible if paint is fully cured and clean | Best surface for most renters; test in an inconspicuous area first |
| Tile, glass, metal, sealed laminates | Often compatible per manufacturer | Good for bathroom or kitchen decor if surfaces are clean and dry |
| Wallpaper or peel-and-stick wallpaper | Not typically recommended | Adhesive can tear or lift wallpaper during removal |
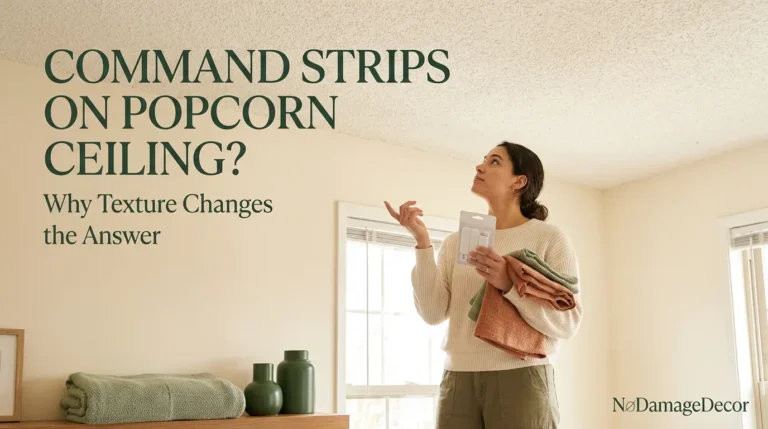
| Textured walls (heavy orange peel, knockdown) | Reduced contact, higher failure risk | Weight capacity may be lower; not a reliable surface for heavy items |
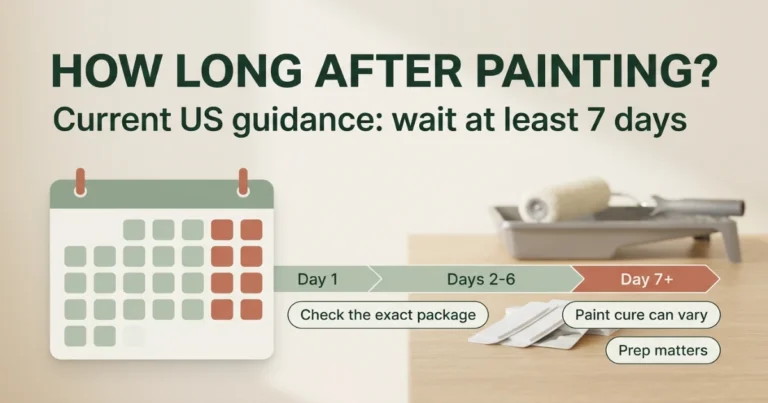
| Freshly painted walls | Not recommended within the first 7 days | Paint needs time to cure; adhesive can peel uncured paint |
| Brick, concrete, unfinished wood | Usually incompatible | Adhesive may not bond well; use mechanical fasteners instead |
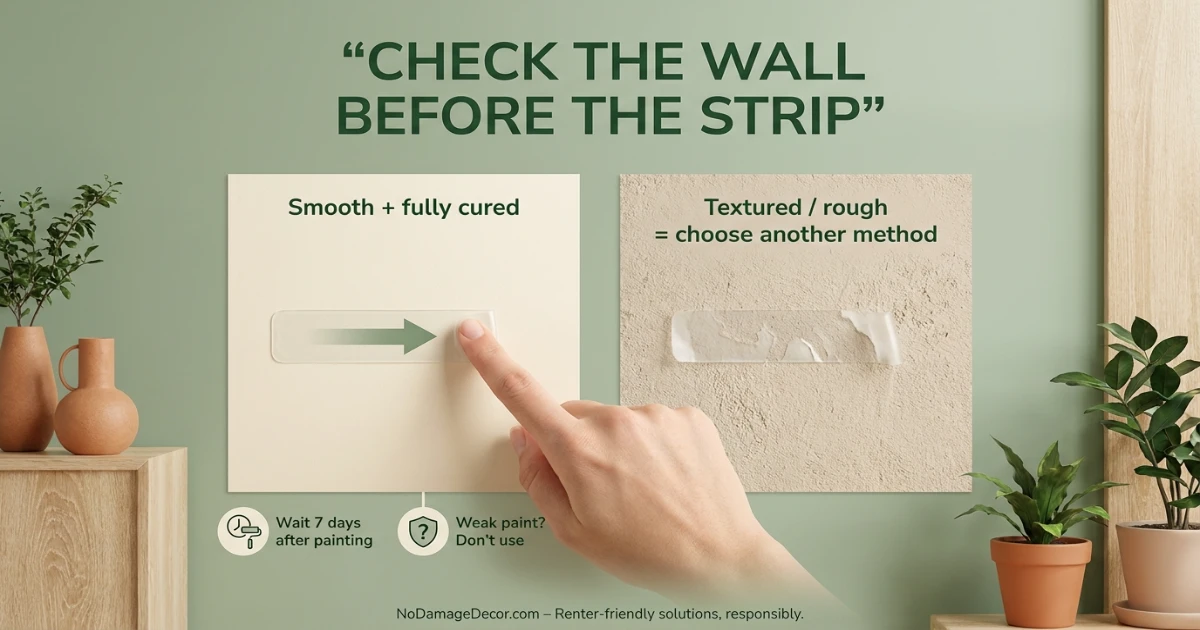
Even on a compatible surface, the adhesive bond is only as good as the paint underneath. If the paint is old, flaking, or poorly adhered, the strip may hold but pull paint away during removal. Test an inconspicuous area first, and avoid using strips on walls with visible paint damage.
How to Choose the Right Size for Your Item
Choosing the correct Command strip size comes down to three questions: what you are hanging, how much it weighs, and where it will be located. Use this decision framework to narrow down the options.
Decision Logic: Choose This When…
Choose small strips when the item weighs only a few ounces, such as a small paper print, a lightweight photo frame, or a thin poster. Small strips are less visible behind narrow frames.
Choose medium strips when you are hanging a typical 8×10 or 11×14 photo frame, a small canvas, a lightweight decorative sign, or a small hook for keys or a light scarf. Medium is the most flexible size for everyday rental decor.
Choose large or extra-large strips only when the item is heavier, such as a large framed piece, a wooden sign, or a small mirror with a frame. These strips have more surface area but are also more visible behind the item, so placement matters.
Choose another hanging method when the item is heavy, fragile, valuable, or will be mounted above a bed, crib, sofa, or walkway. Adhesive-only mounting in injury-risk locations should only be done if the manufacturer’s instructions specifically support it for that use.
| Item Type | Suggested Strip Size | Why |
|---|---|---|
| Small paper print or lightweight photo | Small | Low weight, minimal visibility needed |
| 8×10 or 11×14 frame with glass | Medium | Balances weight support and adhesive coverage |
| Small canvas or wooden sign | Medium or Large | Depends on weight; check manufacturer rating |
| Large framed art or mirror | Large or Extra-Large | Requires more adhesive surface; not for all surfaces |
| Items above beds or cribs | Not recommended | Injury risk if adhesive fails; use landlord-approved hardware |
Installation Tips for Rental Walls
Even the right size strip can fail if the installation is rushed or the surface is not prepared. Follow these steps to give the adhesive the best chance to hold while minimizing paint damage risk.
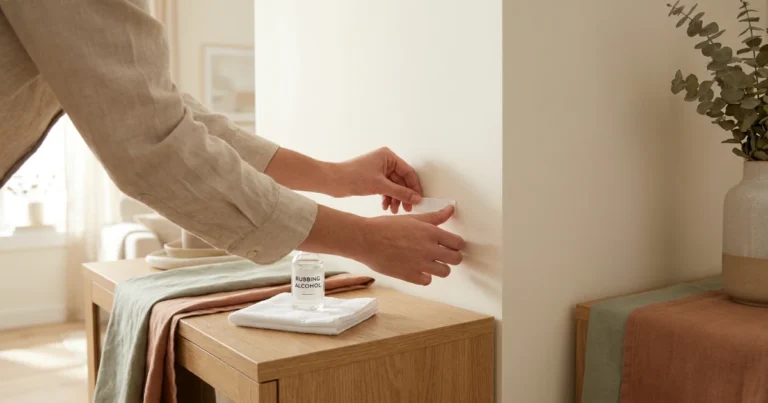
Step 1: Clean the Wall
Wipe the area with isopropyl alcohol and let it dry completely. Do not use household cleaners, which can leave residue that weakens the adhesive.
Step 2: Check the Paint
Make sure the paint is fully cured. If the wall was painted within the last week, wait longer. Uncured paint can peel when the strip is removed.
Step 3: Press Firmly
Press the strip firmly against the wall for the amount of time specified in the manufacturer instructions—often 30 seconds per strip. Use your thumb to apply even pressure across the entire adhesive pad.
Step 4: Wait Before Hanging
Many Command products recommend waiting a period of time—often one hour—before placing weight on the strip. This allows the adhesive to build initial bond strength. Check the package for the exact wait time.
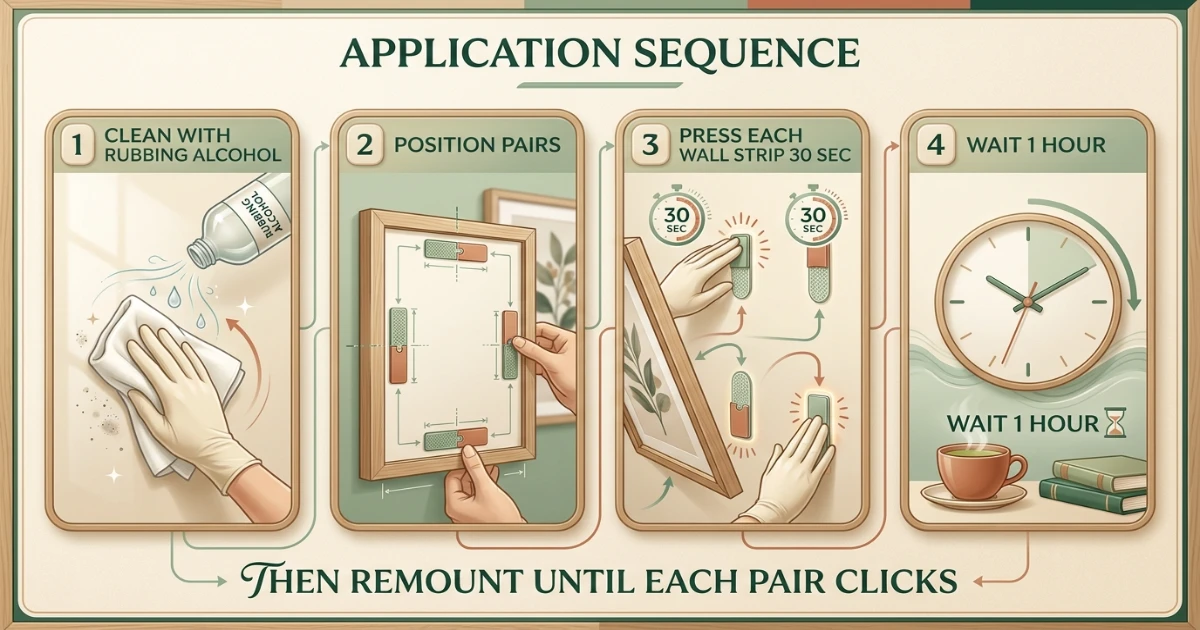
Do not skip the wait time. Adhesive strips need time to reach their rated strength. Hanging an item immediately can cause the strip to slide or fail.
Removing Command Strips Without Damaging Paint
Removal is where many renters accidentally damage walls. The correct technique matters as much as the correct size. Command strips are designed to release when you pull the tab straight down, parallel to the wall—never outward.
Pulling the tab toward you or pulling the strip away from the wall can stretch the adhesive unevenly and peel paint or drywall paper. Always pull straight down, slowly, along the surface of the wall.
If the strip resists, do not yank it. Stop and check the manufacturer’s removal guidance. Some strips may need a gentle, continuous pull over several seconds. If paint begins to lift, stop immediately and evaluate whether the wall surface is too delicate for adhesive removal.
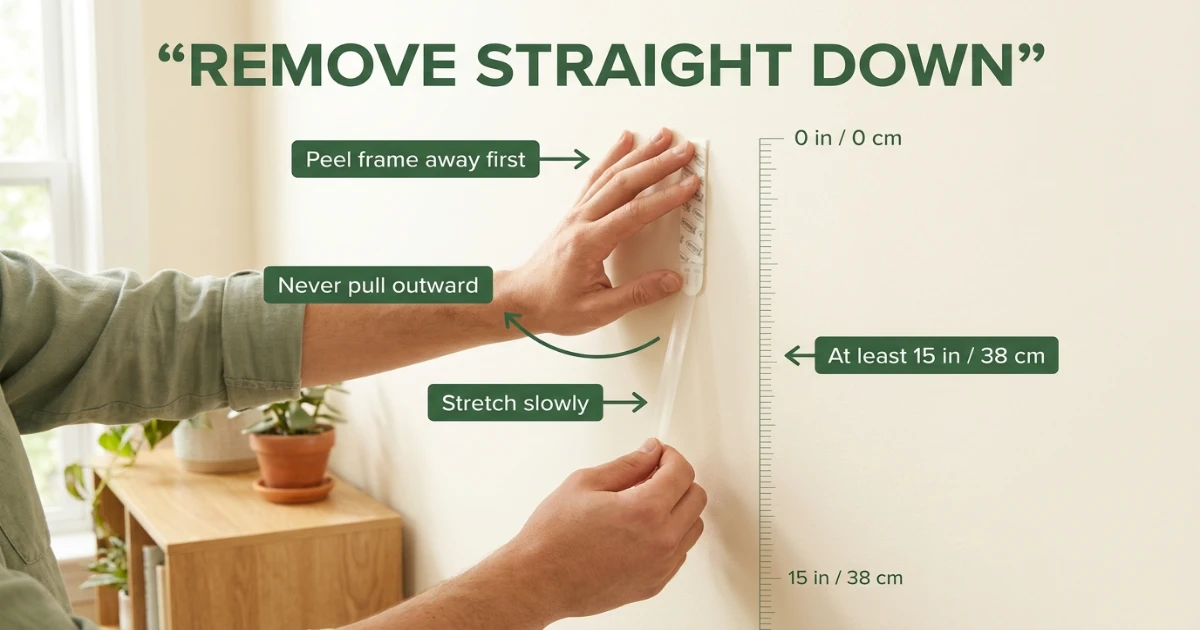
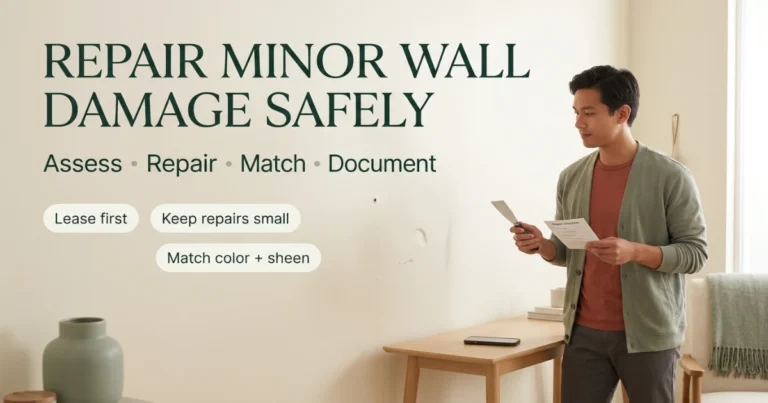
After removal, check the wall for residue or minor paint lifting. If paint has lifted, document the area with photos and consider whether a small touch-up is appropriate. See our guide on remove Command strips without damage for more detail.
Common Mistakes Renters Make with Command Strips
Most Command strip failures in rentals come from one of a few predictable mistakes. Avoiding these is often more important than choosing a specific size.
If the item is near the upper end of the strip’s rated capacity, it may hold initially but fail over time, especially in warm or humid conditions.
Large strips on weak or textured paint can create a stronger bond than the paint itself. During removal, the paint may peel away with the strip, even if the installation seemed fine.
Heavy frames, shelves, or decorative objects above beds, sofas, or cribs can cause injury if the adhesive fails. Unless the manufacturer explicitly supports this use for the exact product and surface, choose a mechanical fastener instead.
Textured walls reduce adhesive contact. A strip that works on smooth drywall may fail on orange-peel or knockdown texture. If your rental has textured walls, use a lower weight expectation or choose another method.
Alternatives When Command Strips Aren’t the Right Fit
Command strips are not the only renter-friendly hanging option, and they are not the best choice for every situation. If the item is too heavy, the surface is incompatible, or you are worried about paint damage, consider one of these approaches.
Option 1: Low-Profile Nails with Landlord Permission
Small finish nails leave minimal holes and may be acceptable under many leases if you ask first. A single small nail hole is often easier to repair than a paint peel from adhesive. Review your lease and get written permission if possible.
Option 2: Removable Wallpaper or Decals
For lightweight paper items or posters, removable wallpaper or decals can be a lower-risk alternative to adhesive strips. They cover larger areas without concentrated adhesive points. See our guide to the best peel and stick wallpaper for surface-safe options.
Option 3: Freestanding Displays
Leaning framed art on a shelf, using a small easel, or placing items on a tabletop stand can eliminate wall mounting entirely. This is often the lowest-risk option for renters who want to avoid any wall contact.
For more on avoiding wall damage while decorating, see our guide to hang art without nails.
Sources & Renter-Safety Note
This guide provides general sizing and usage principles for Command strips, but exact weight ratings, dimensions, and surface compatibility vary by product line and packaging updates. Always check the current manufacturer documentation for the specific product you are using.
For authoritative guidance on Command product specifications and installation instructions, refer to the official Command brand website or the product packaging. Surface compatibility and removal techniques are described here in general terms; the manufacturer’s current instructions take precedence.
Rules about wall alterations and security deposits vary by state, city, lease, and property. Review your lease and keep dated photos of wall conditions before and after using any adhesive product.
Frequently Asked Questions
What is the most common Command strip size for picture frames?
For typical 8×10 or 11×14 frames, medium picture hanging strips are a common starting point. However, the right size depends on the total weight of the frame and glass, so check the manufacturer’s rated limit before hanging.
Can I use large Command strips on a small frame?
You can, but the strips may be visible behind the frame and may create a stronger bond than needed for the surface. Using a strip that is too large on weak paint can increase the risk of paint peeling during removal. Match the strip size to the item weight and surface condition.
How long should I wait before hanging something on a Command strip?
Many Command products recommend waiting about one hour after pressing the strip to the wall before placing weight on it. Check the exact product package for the current wait time, as it can vary by product line.
Do Command strips work on textured apartment walls?
Textured walls reduce adhesive contact, which can lower the effective weight capacity and increase the risk of failure. Light orange-peel may work for very light items, but heavy knockdown texture is generally not a reliable surface. Test in an inconspicuous area first and use a conservative weight margin.
Can I remove Command strips without damaging paint?
When removed correctly—pulling the tab straight down, slowly, parallel to the wall—many Command strips release without paint damage. However, if the paint is old, uncured, or poorly adhered, it may peel. Stop immediately if you see paint lifting and document the area.
Are Command strips safe for hanging items above a bed?
Adhesive-only mounting above beds, cribs, or other injury-risk areas is generally not recommended unless the manufacturer’s instructions specifically support that exact product and surface for the item weight. For heavy or fragile items in these locations, use landlord-approved mechanical hardware instead.
Renter-Safety Verdict
Command strips can be a useful, lower-risk hanging method for renters when you choose the right size for the item and the surface. The safest approach is to match the strip’s rated capacity to the item with a comfortable margin, install it on clean, fully cured painted drywall, wait the recommended time before hanging, and remove it by pulling straight down slowly.
Avoid using Command strips when the wall has heavy texture, the paint is fresh or flaking, the item is heavy or fragile, or the location is above a bed, crib, or walkway. If you are unsure about the weight rating or surface compatibility, choose a different method or ask your landlord. The goal is to avoid both falling objects and paint damage at move-out.
Know Your Weight Limits Before You Hang
Once you understand Command strip sizes, the next step is understanding how much weight they can actually hold. Our dedicated guide breaks down weight limits, surface factors, and safety margins for renters.
Read the Weight Limit Guide