How to Test Command Strips Before Hanging Decor
A step-by-step renter-conscious process to test adhesion, weight tolerance, and removal safety before you commit to a full wall display.
Quick Answer
Before hanging anything with Command strips, run a small test in a hidden spot. Clean the wall, apply one strip, wait the full recommended time, then remove it slowly to check for paint damage. If the wall surface is smooth, clean, and well-adhered, and the strip removes without lifting paint or leaving residue, you can proceed with confidence. Always respect the rated weight limit and use multiple strips for larger items.
At a Glance
Most Important Test
Inconspicuous area removal test after full adhesion time.
Biggest Mistake
Ignoring the wall’s paint condition or using too few strips.
Wall Risk
Peeling paint on poorly primed surfaces or when removed incorrectly.
Key Rule
Test before you trust. Document the wall before and after.
On This Page
Why Testing Command Strips Matters
Command strips are popular among renters because they offer a way to hang decor without drilling holes. But they are not universally damage-proof. The adhesive can pull paint off poorly primed walls, leave residue on certain finishes, or fail to hold if the surface is dusty, textured, or too cold. Testing before you hang a full gallery wall or a heavy frame can prevent both wall damage and deposit deductions.
A small test strip gives you real information about how the adhesive will behave on your exact wall. It shows whether the paint is strong enough to withstand removal, whether the surface texture allows good contact, and whether the strip can hold the weight you need. Spending a few minutes on a test is much cheaper than repairing peeled paint or paying a security deposit penalty.
Before You Start: What You Need
Gather a few simple items. You do not need anything expensive, but having the right tools makes the test accurate and safe.
- A small package of the exact Command strips you plan to use
- Isopropyl alcohol or a mild cleaner approved for painted walls
- A clean, lint-free cloth
- A small level or ruler (for weight distribution checks)
- A hair dryer (optional, for removal ease)
- Your phone for dated photos
Read the manufacturer’s instructions on the package before starting. Check the rated weight limit, the recommended surface types, and the required waiting time after application. Different Command products have different specifications, so do not assume all strips behave the same way.
Step 1: Assess the Wall Surface
Start by examining the wall where you plan to hang your decor. The surface condition is the single biggest factor in whether Command strips will hold and remove cleanly.
Check Paint Adhesion
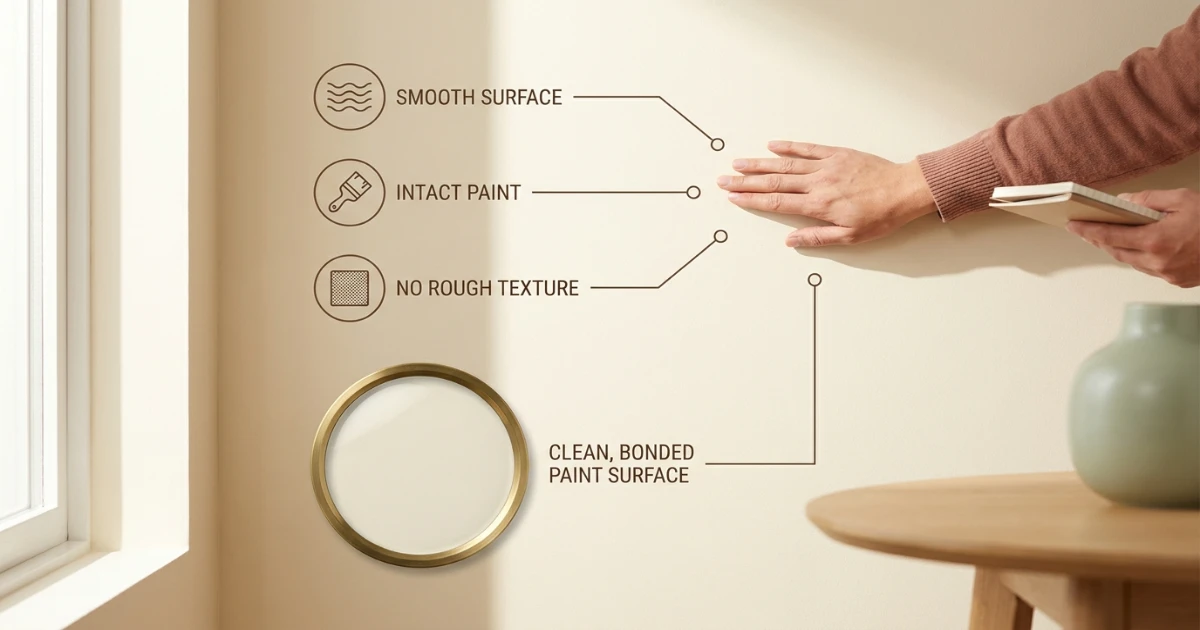
Run your hand lightly over the wall. Does the paint feel smooth and firmly attached, or does it flake, bubble, or feel chalky? If you see any peeling or flaking, do not use adhesive strips in that area. The adhesive may bond to the loose paint and pull it off during removal.
Check Paint Sheen
Glossy and semi-gloss paints can reduce adhesion because the surface is less porous. Flat and eggshell finishes usually provide better grip. If your wall is glossy, you may need to clean it more thoroughly and press the strip firmly for the full recommended time. On the other hand, glossy paints are often more durable and less likely to peel.
Check Wall Texture
Command strips work best on smooth surfaces. Light orange peel texture may still work, but heavy knockdown or popcorn texture can prevent the adhesive from making full contact. If the texture is pronounced, the strip may not hold the rated weight. Test a small area before committing.
Step 2: Perform an Inconspicuous Adhesion Test
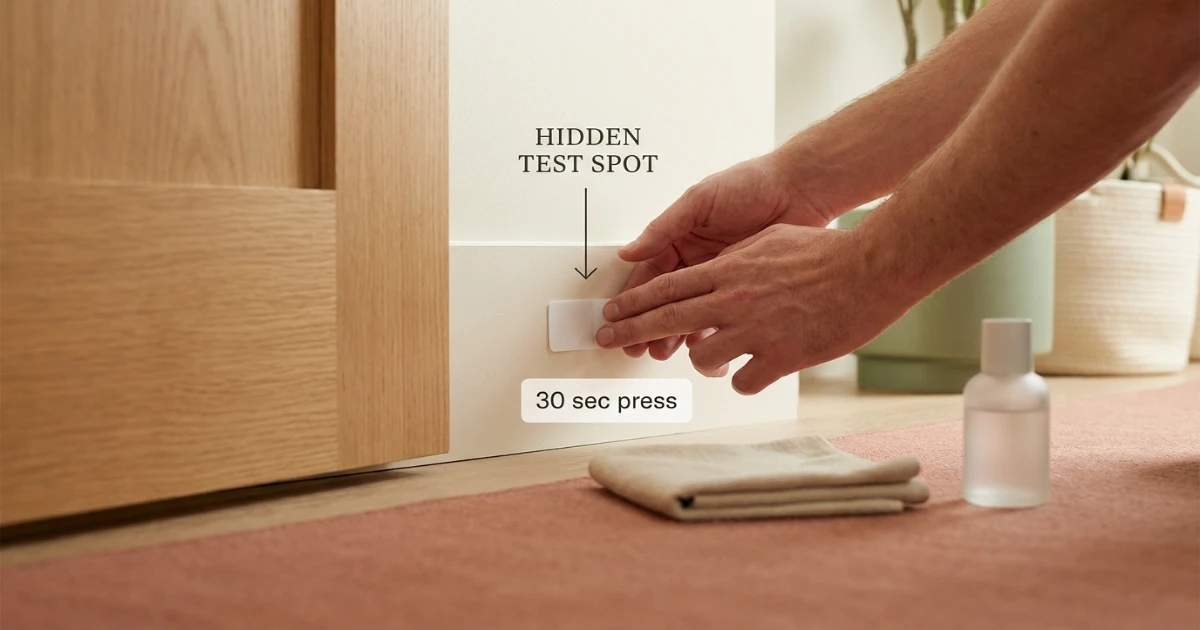
Choose a hidden spot to test—behind a door, inside a closet, or near the floor behind furniture. The goal is to test on the same wall surface without creating a visible mark if something goes wrong.
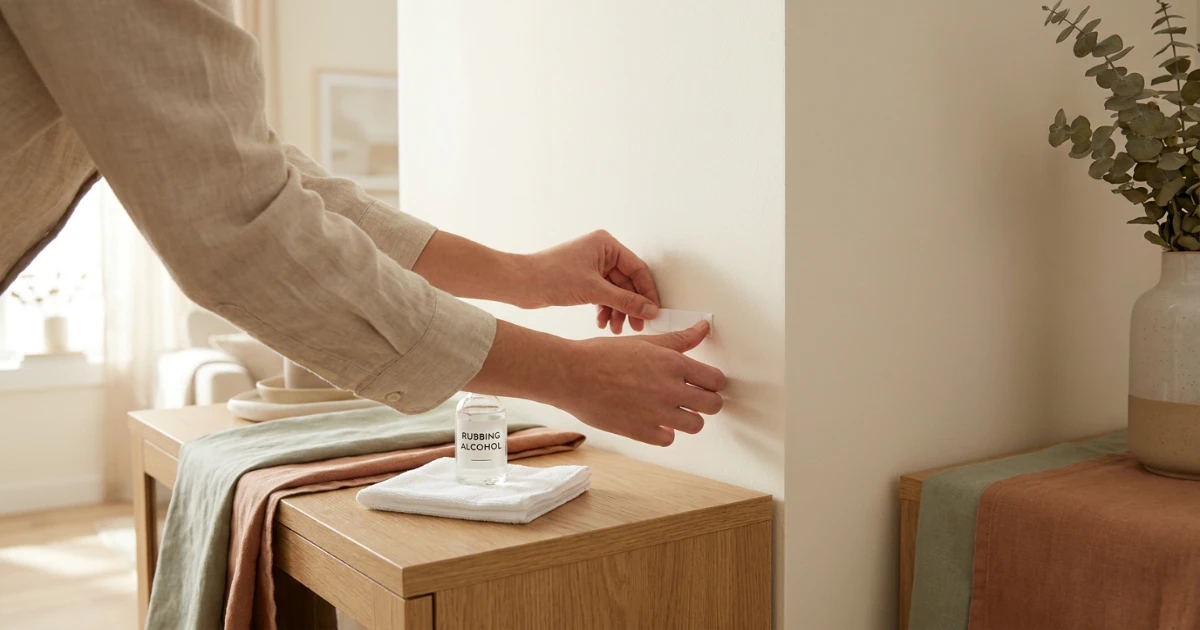
- Clean the test area. Dampen a lint-free cloth with isopropyl alcohol or a mild wall cleaner. Wipe the area thoroughly and let it dry completely. Oils, dust, and residue are common reasons strips fail.
- Apply one strip. Peel the liner from one side of a Command strip and press it firmly onto the wall. Use your thumb or a soft cloth to apply even pressure across the entire strip for at least 30 seconds. Do not press so hard that you dent the wall.
- Wait the full recommended time. Most Command strips require at least one hour before weight is applied, but for testing purposes, wait at least the full curing time stated on the package. If the instructions say “wait 1 hour before hanging,” wait that full hour before moving to the removal test. This ensures the adhesive has reached full strength.
Step 3: Test the Weight and Hold
While the test strip is curing, think about the actual item you want to hang. The rated weight limit on Command strips is for a single strip, but the effective holding power depends on several factors: wall texture, paint sheen, temperature, and how evenly the weight is distributed.
If you are hanging a lightweight poster or photo, one or two strips may be enough. But for a framed picture, a small shelf, or anything with a lever effect, you need more strips. The manufacturer usually provides guidance based on the size and weight of the item. Use that as a starting point, not a guarantee.
If you want to be extra cautious, you can simulate the weight before hanging the real item. For example, attach a small bag with a similar weight (using a hook or clip that does not damage the test strip) to the test strip and let it hang for a few hours. This is optional but can reveal if the adhesive is creeping or losing grip. Do not overload the test strip beyond its rated limit.
Step 4: Removal Test and Evaluation
After the waiting period, it is time to remove the test strip. The removal method matters as much as the application.
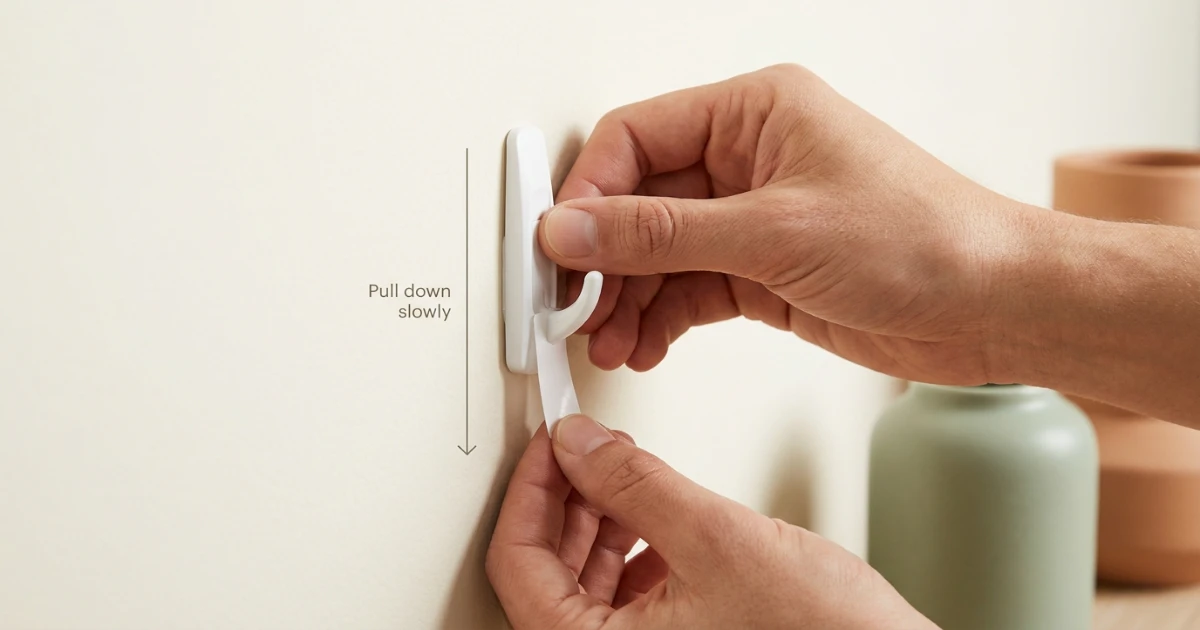
- Pull straight down, slowly. Grasp the pull tab (if present) and pull it straight down along the wall, keeping the tab close to the surface. Do not pull outward or at an angle. The adhesive is designed to stretch and release, not tear away.
- Pull slowly and steadily. It may take 10–20 seconds for the adhesive to release completely. If you feel resistance, stop and warm the strip gently with a hair dryer on low heat for 15–20 seconds, then continue pulling slowly.
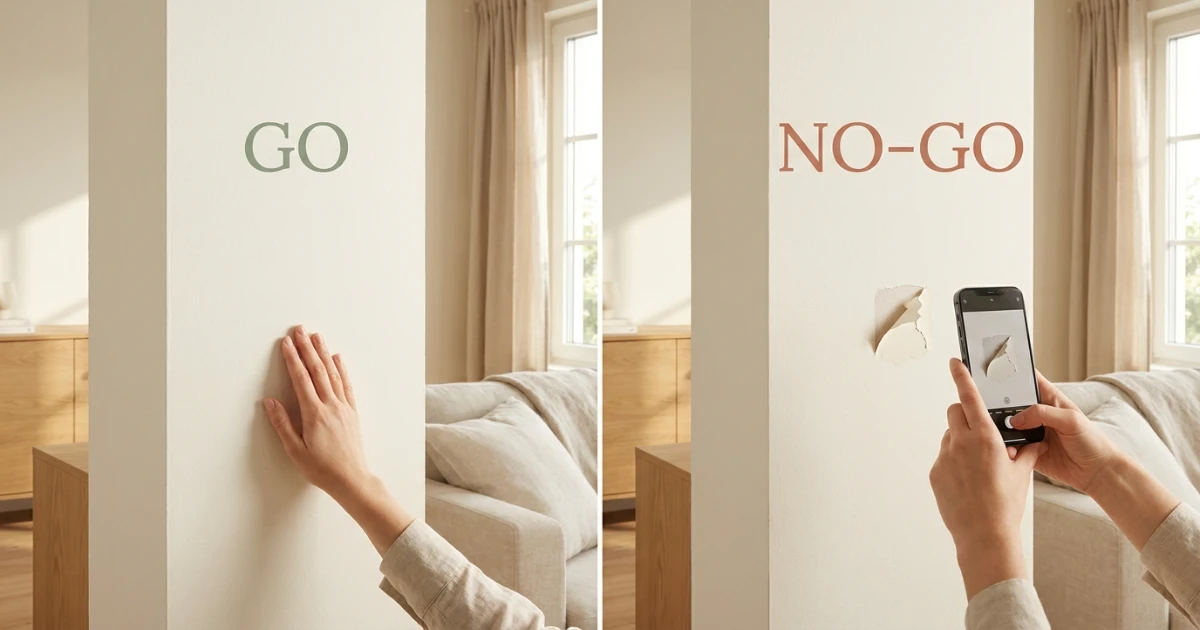
- Inspect the wall immediately. Look for any paint lifting, tears in drywall paper, or adhesive residue. Run your hand over the area. If the paint is intact and there is no residue, the test was successful.
- If residue remains, remove it gently. Use a clean, dry cloth to rub the residue in one direction. If that does not work, a tiny amount of isopropyl alcohol on a cotton swab can help, but test it in an even more hidden spot first.
Document the test area with a dated photo. If the wall looks fine, you have a good indication that the strips will work elsewhere on the same surface. If there is any damage, stop and consider alternatives.
Interpreting Test Results: Go or No-Go
After the removal test, use this decision table to decide whether to proceed with Command strips in your apartment.
| Test Result | What It Means | What to Do |
|---|---|---|
| Strip removed cleanly, no paint lift, no residue | The wall surface and paint are compatible with the adhesive | Proceed with confidence, using the recommended number of strips |
| Strip removed cleanly but left light residue | The adhesive bonded well but left a film; the paint itself is intact | Clean residue with a gentle method, then proceed. Monitor the final removal. |
| Paint lifted, even a small amount | The paint is not well-adhered to the wall or the surface is too fragile | Stop. Do not use adhesive strips on this wall. Consider alternative hanging methods. |
| Strip fell off before removal test | Surface was not clean enough, or the wall texture/sheen prevented adhesion | Clean the area again and retest. If it fails again, use a different method. |
| Strip held but felt loose during weight simulation | The rated weight may be too high for your specific wall surface | Use more strips or a lighter item, or choose a different hanging method. |
Common Testing Mistakes to Avoid
Even a small test can go wrong if you rush or skip steps. Here are the most common mistakes renters make when testing Command strips, and how to avoid them.
Mistake 1: Testing on a Different Wall Surface
Your apartment may have different paint in different rooms. A test behind a door in the living room may not reflect the wall in the bathroom, where moisture and temperature vary. Test in the exact room or on the exact wall you plan to use.
Mistake 2: Removing the Test Strip Too Early
Adhesive needs time to reach full strength. If you remove the strip after five minutes, the adhesive may not have bonded properly, giving you a false sense of security. Wait the full recommended time, usually at least one hour, before removal testing.
Mistake 3: Pulling the Tab Outward
The pull tab is designed to be pulled straight down along the wall, not away from it. Pulling outward puts direct stress on the paint and increases the risk of peeling. Keep the tab flat against the wall as you pull.
Mistake 4: Using Too Few Strips for the Weight
One test strip might hold fine, but that does not mean one strip will hold your heavy frame. Always use the number of strips recommended by the manufacturer for the item’s weight and size, and never exceed the per-strip limit.
Alternatives If the Test Fails
If your Command strip test shows paint lifting, the strip falling off, or other problems, do not force the method. There are several renter-friendly alternatives that may work better for your wall.
- Use a different adhesive brand or type. Some adhesives are designed for more delicate surfaces. Look for products labeled “low-tack” or “removable.” Always test the new product the same way.
- Try a tension rod or leaning display. For lightweight art, a leaning frame on a shelf or a tension rod between two walls avoids adhesive entirely.
- Use existing fixtures. Hang from curtain rods, door frames, or cabinet hardware if allowed, without adding new holes.
- Ask your landlord for permission to use small nails. In some rentals, small nail holes are considered normal wear. Get written permission first, and keep the holes minimal.
For more ideas on damage-free wall decor, see our guide to no-damage wall decor ideas or learn how to hang art without nails.
Renter-Safety Verdict
Testing Command strips before hanging decor is a smart, low-cost insurance policy for your security deposit. A five-minute test on a hidden section of wall can reveal paint weaknesses, surface incompatibility, or adhesion problems before you commit to a full display. Always clean the surface, wait the full cure time, remove slowly, and document the process. If the test shows any paint lift or residue, do not proceed—choose a different hanging method. When in doubt, ask your landlord or use a tension rod or leaning display. Protecting your walls is always worth the extra few minutes.
Learn How Much Weight Command Strips Can Really Hold
Before you trust a test strip, understand the real weight limits and how many strips you need for frames, shelves, and decor. Avoid overloading and protect your deposit.
Read the Weight Limit GuideFrequently Asked Questions
How long should I wait before testing a Command strip removal?
Wait at least the full recommended adhesion time stated on the package, typically one hour. For a more reliable test, wait 24 hours if possible. Removing too early may give a false result because the adhesive has not fully bonded.
Can I test Command strips on a painted wall without leaving a mark?
If the paint is well-adhered and the wall is clean, a properly removed Command strip should not leave a mark. However, there is always a small risk, especially on older or poorly primed surfaces. Test in an inconspicuous spot first.
What should I do if the test strip pulls off paint?
Stop immediately. Do not use adhesive strips on that wall. Take dated photos of the area and contact your landlord for advice. For future decor, use alternatives like tension rods, leaning frames, or existing fixtures.
Do I need to clean the wall before testing Command strips?
Yes. Dust, oils, and residue prevent the adhesive from bonding properly. Wipe the area with isopropyl alcohol or a mild wall cleaner, then let it dry completely before applying the strip.
Can I use Command strips on textured walls?
Light texture may work, but heavy texture reduces contact area and holding power. Always test on a small, hidden section. If the strip does not stick firmly, use a different hanging method.
How many Command strips should I use for a framed picture?
Follow the manufacturer’s recommendation based on the frame’s size and weight. As a general rule, use at least two pairs for anything heavier than a small poster. Never exceed the rated limit per strip. Check the specific product instructions.
Is testing Command strips necessary if I have used them before in a different apartment?
Yes. Different apartments have different paint, wall texture, and humidity. A surface that worked before may not work in your current rental. Always test on the actual wall you plan to use.
Sources & Renter-Safety Note
This guide provides general information for testing adhesive strips on painted walls in US rental apartments. Paint adhesion, wall texture, and surface conditions vary. Always follow the manufacturer’s instructions for the specific product. Security deposit rules and normal wear definitions vary by state, city, and lease. For legal questions, consult your lease or a tenant rights organization.